Appearance
Single Sign-On with Google Workspace
This guide demonstrates how to configure single sign-on with Google Workspace.
Google Workspace configuration
Log in to your Google Workspace Admin Console.
Add application
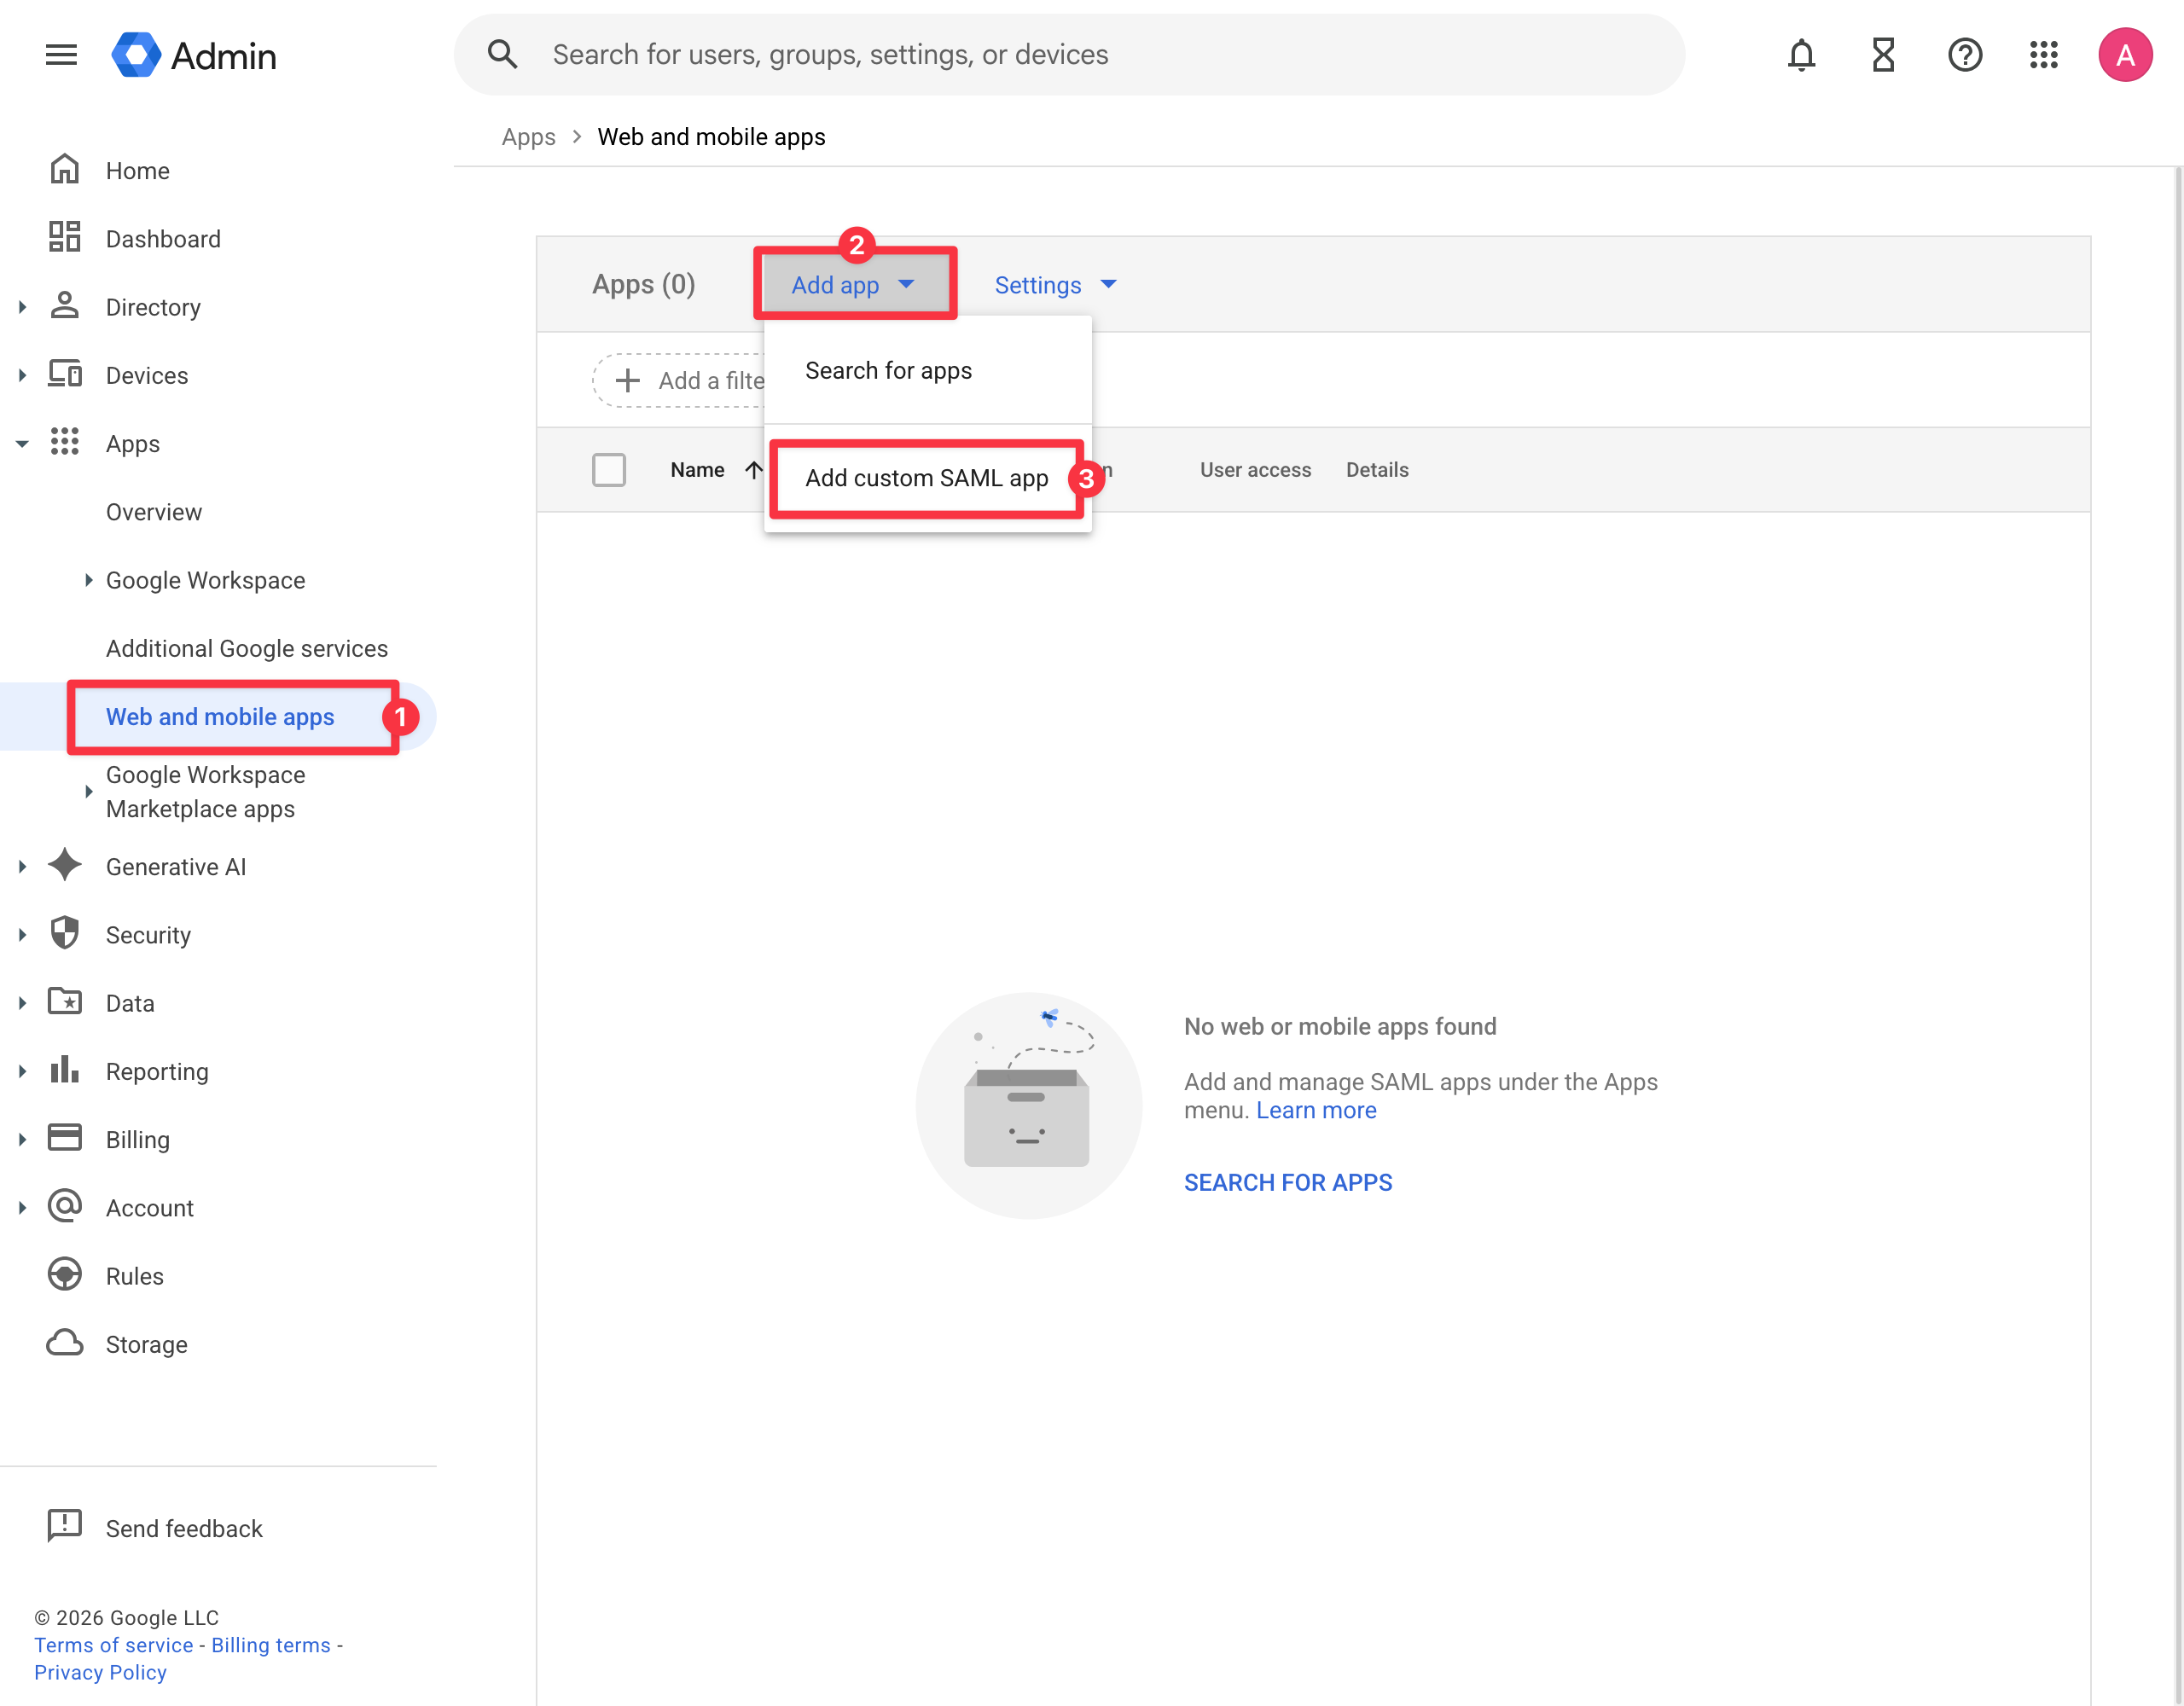
- Open the navigation panel, Apps → Web and mobile apps
- Click the Add app dropdown at the top of the main page area
- Click Add custom SAML app
App details
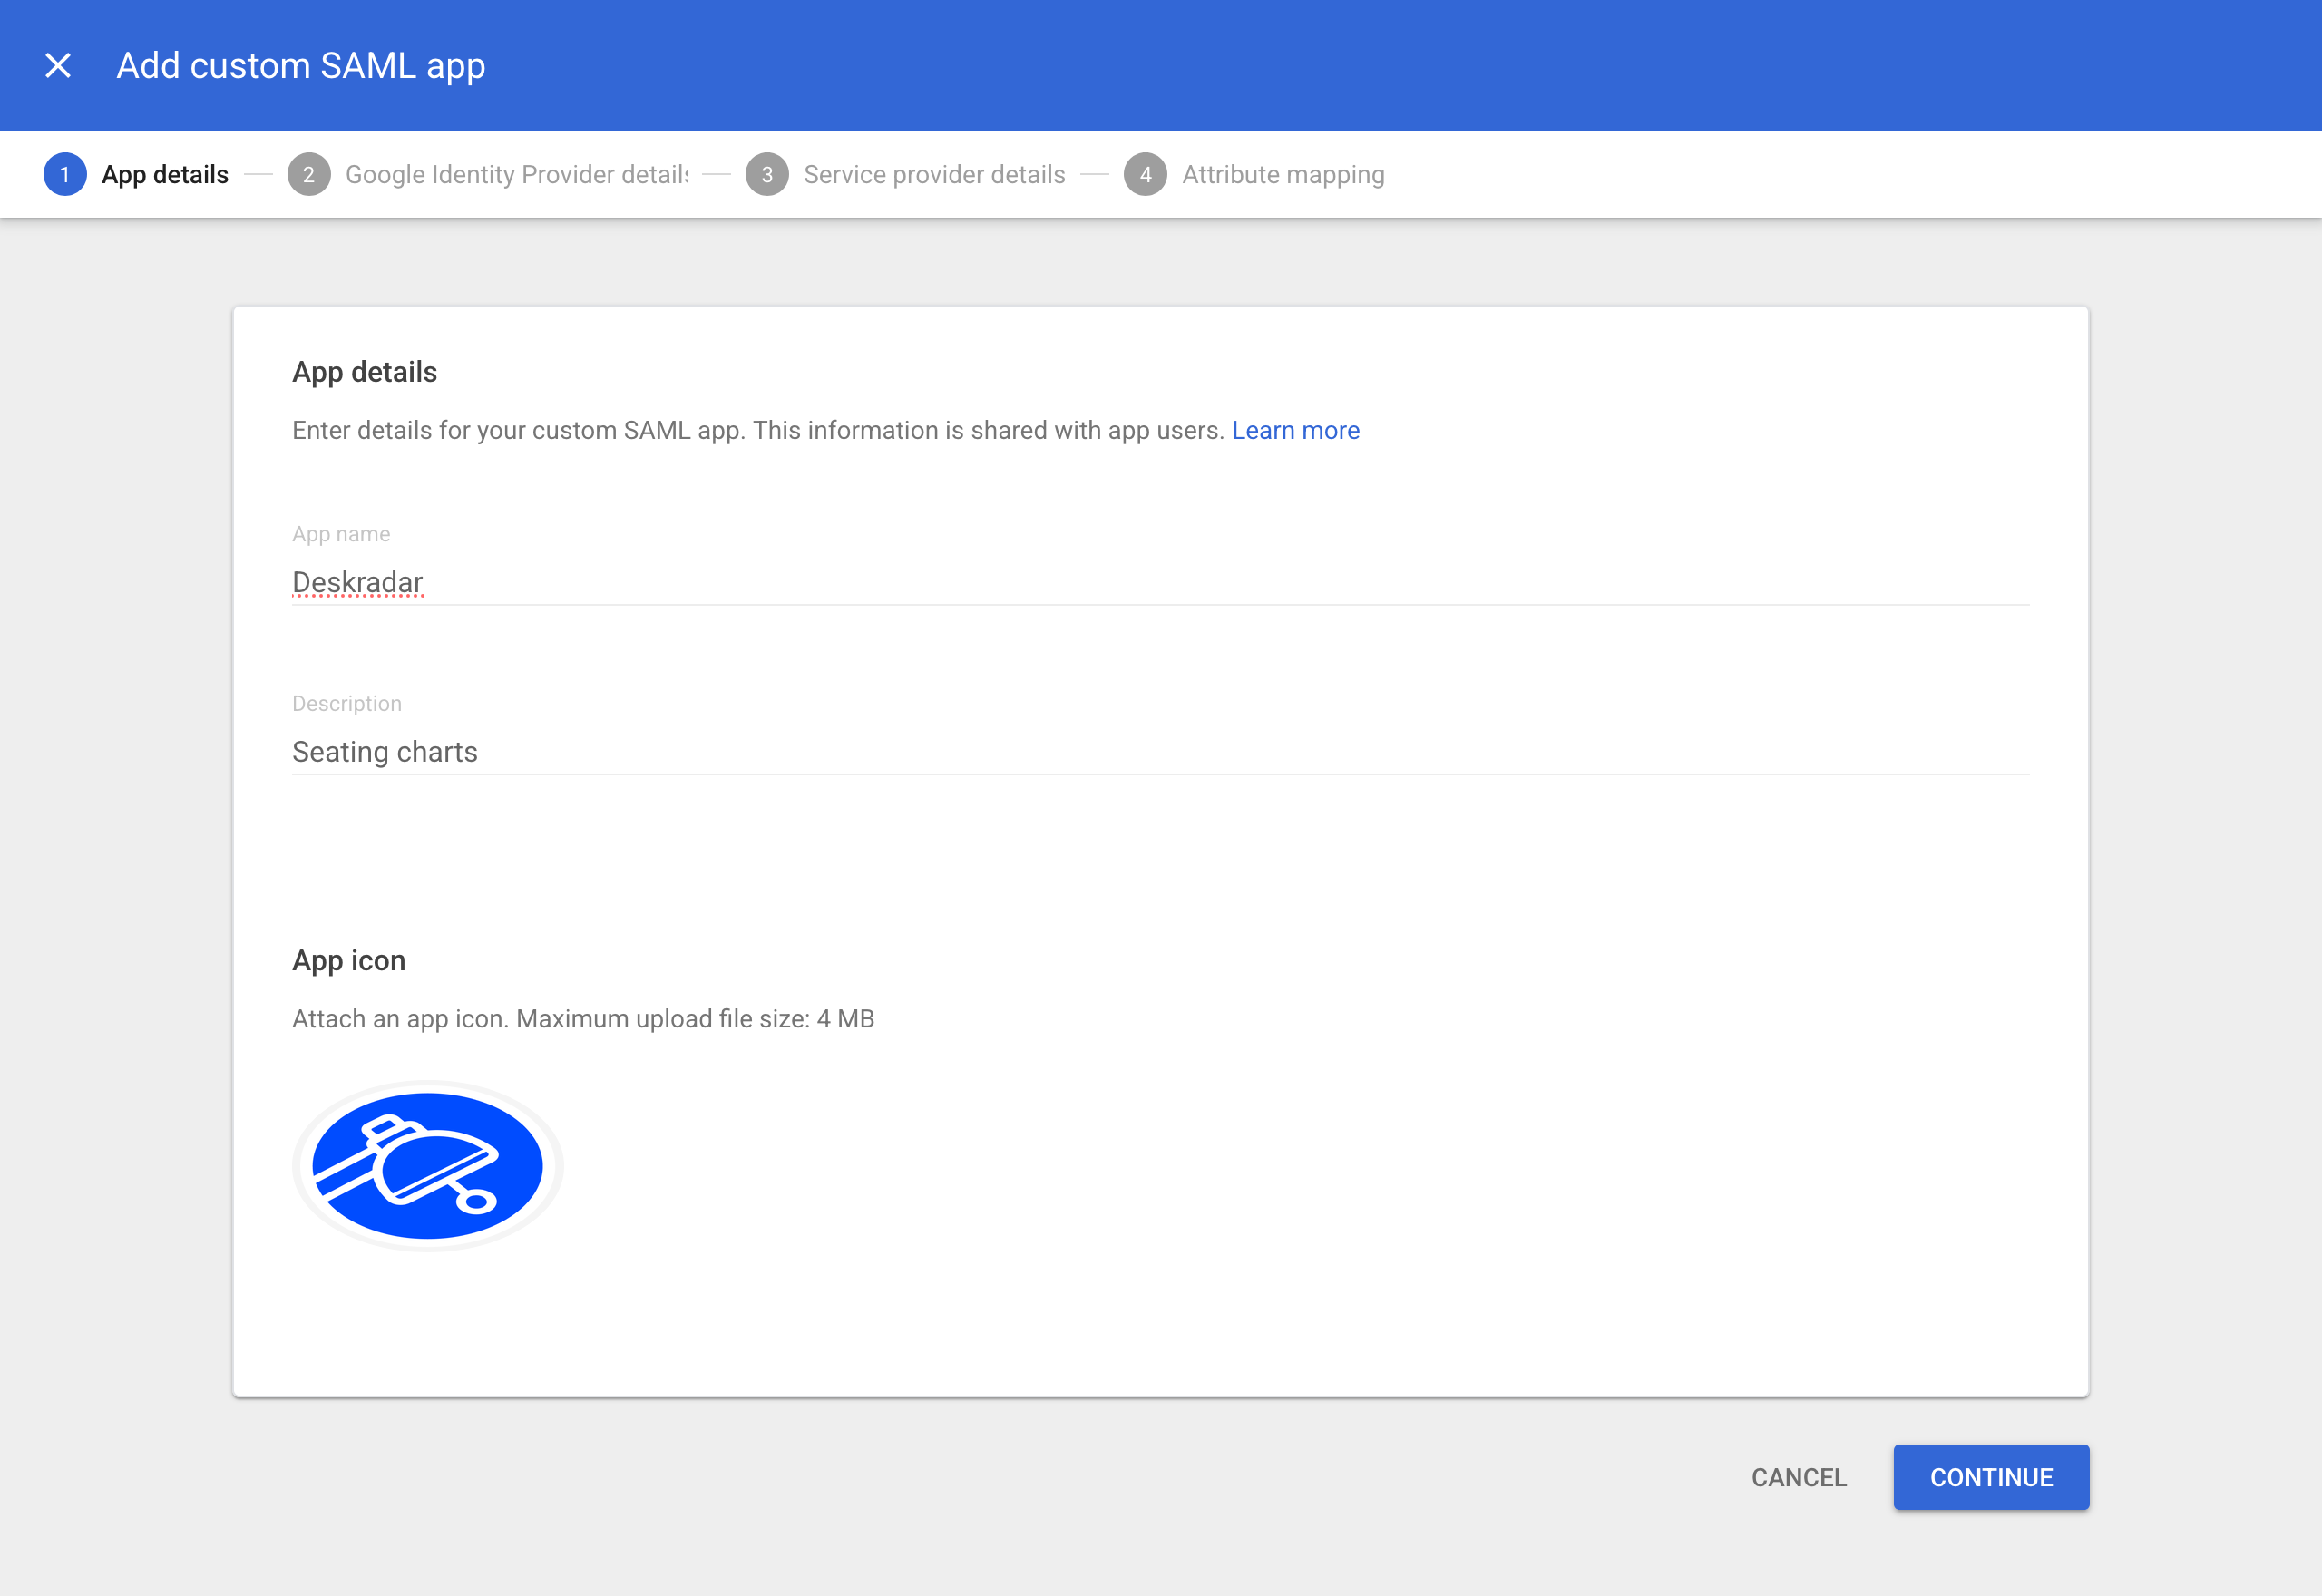
In the App name field, enter Deskradar
In the Description field, enter Interactive Floor Plans
Upload the application logo into the Upload logo field

Click Continue
Google identity provider information
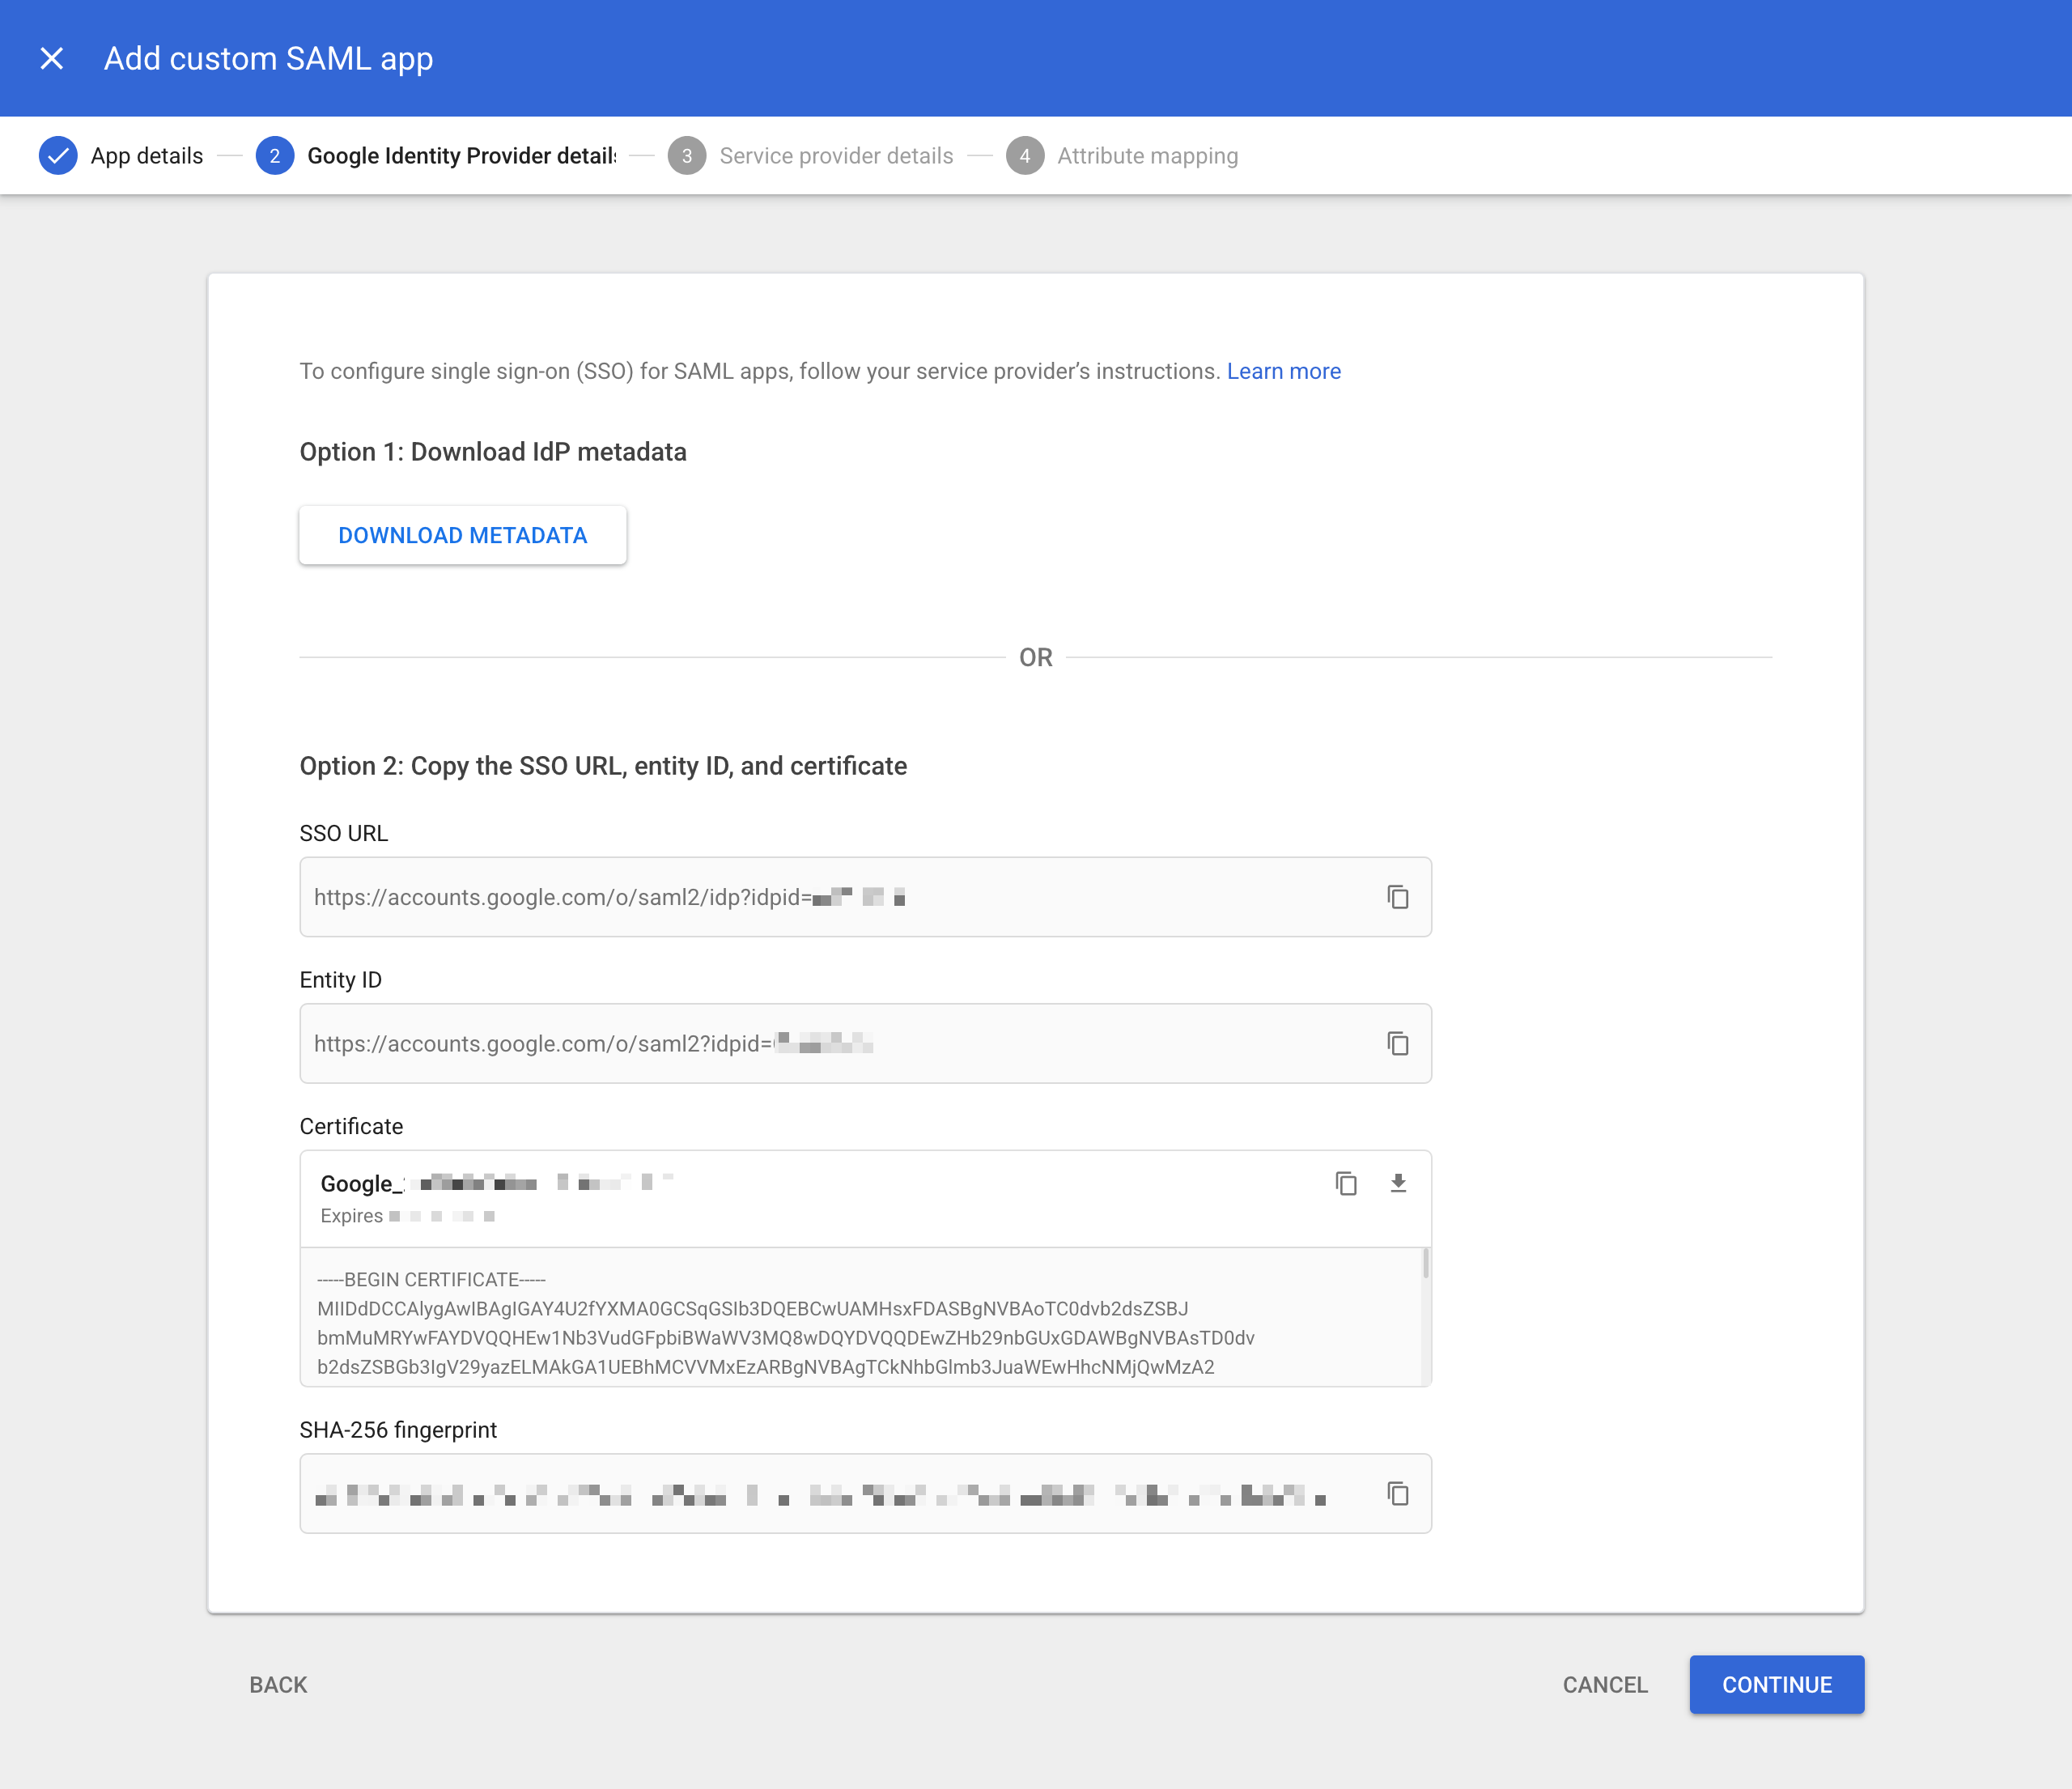
Copy the contents of the SSO URL, Entity ID and Certificate fields.
Click Continue.
Service provider details
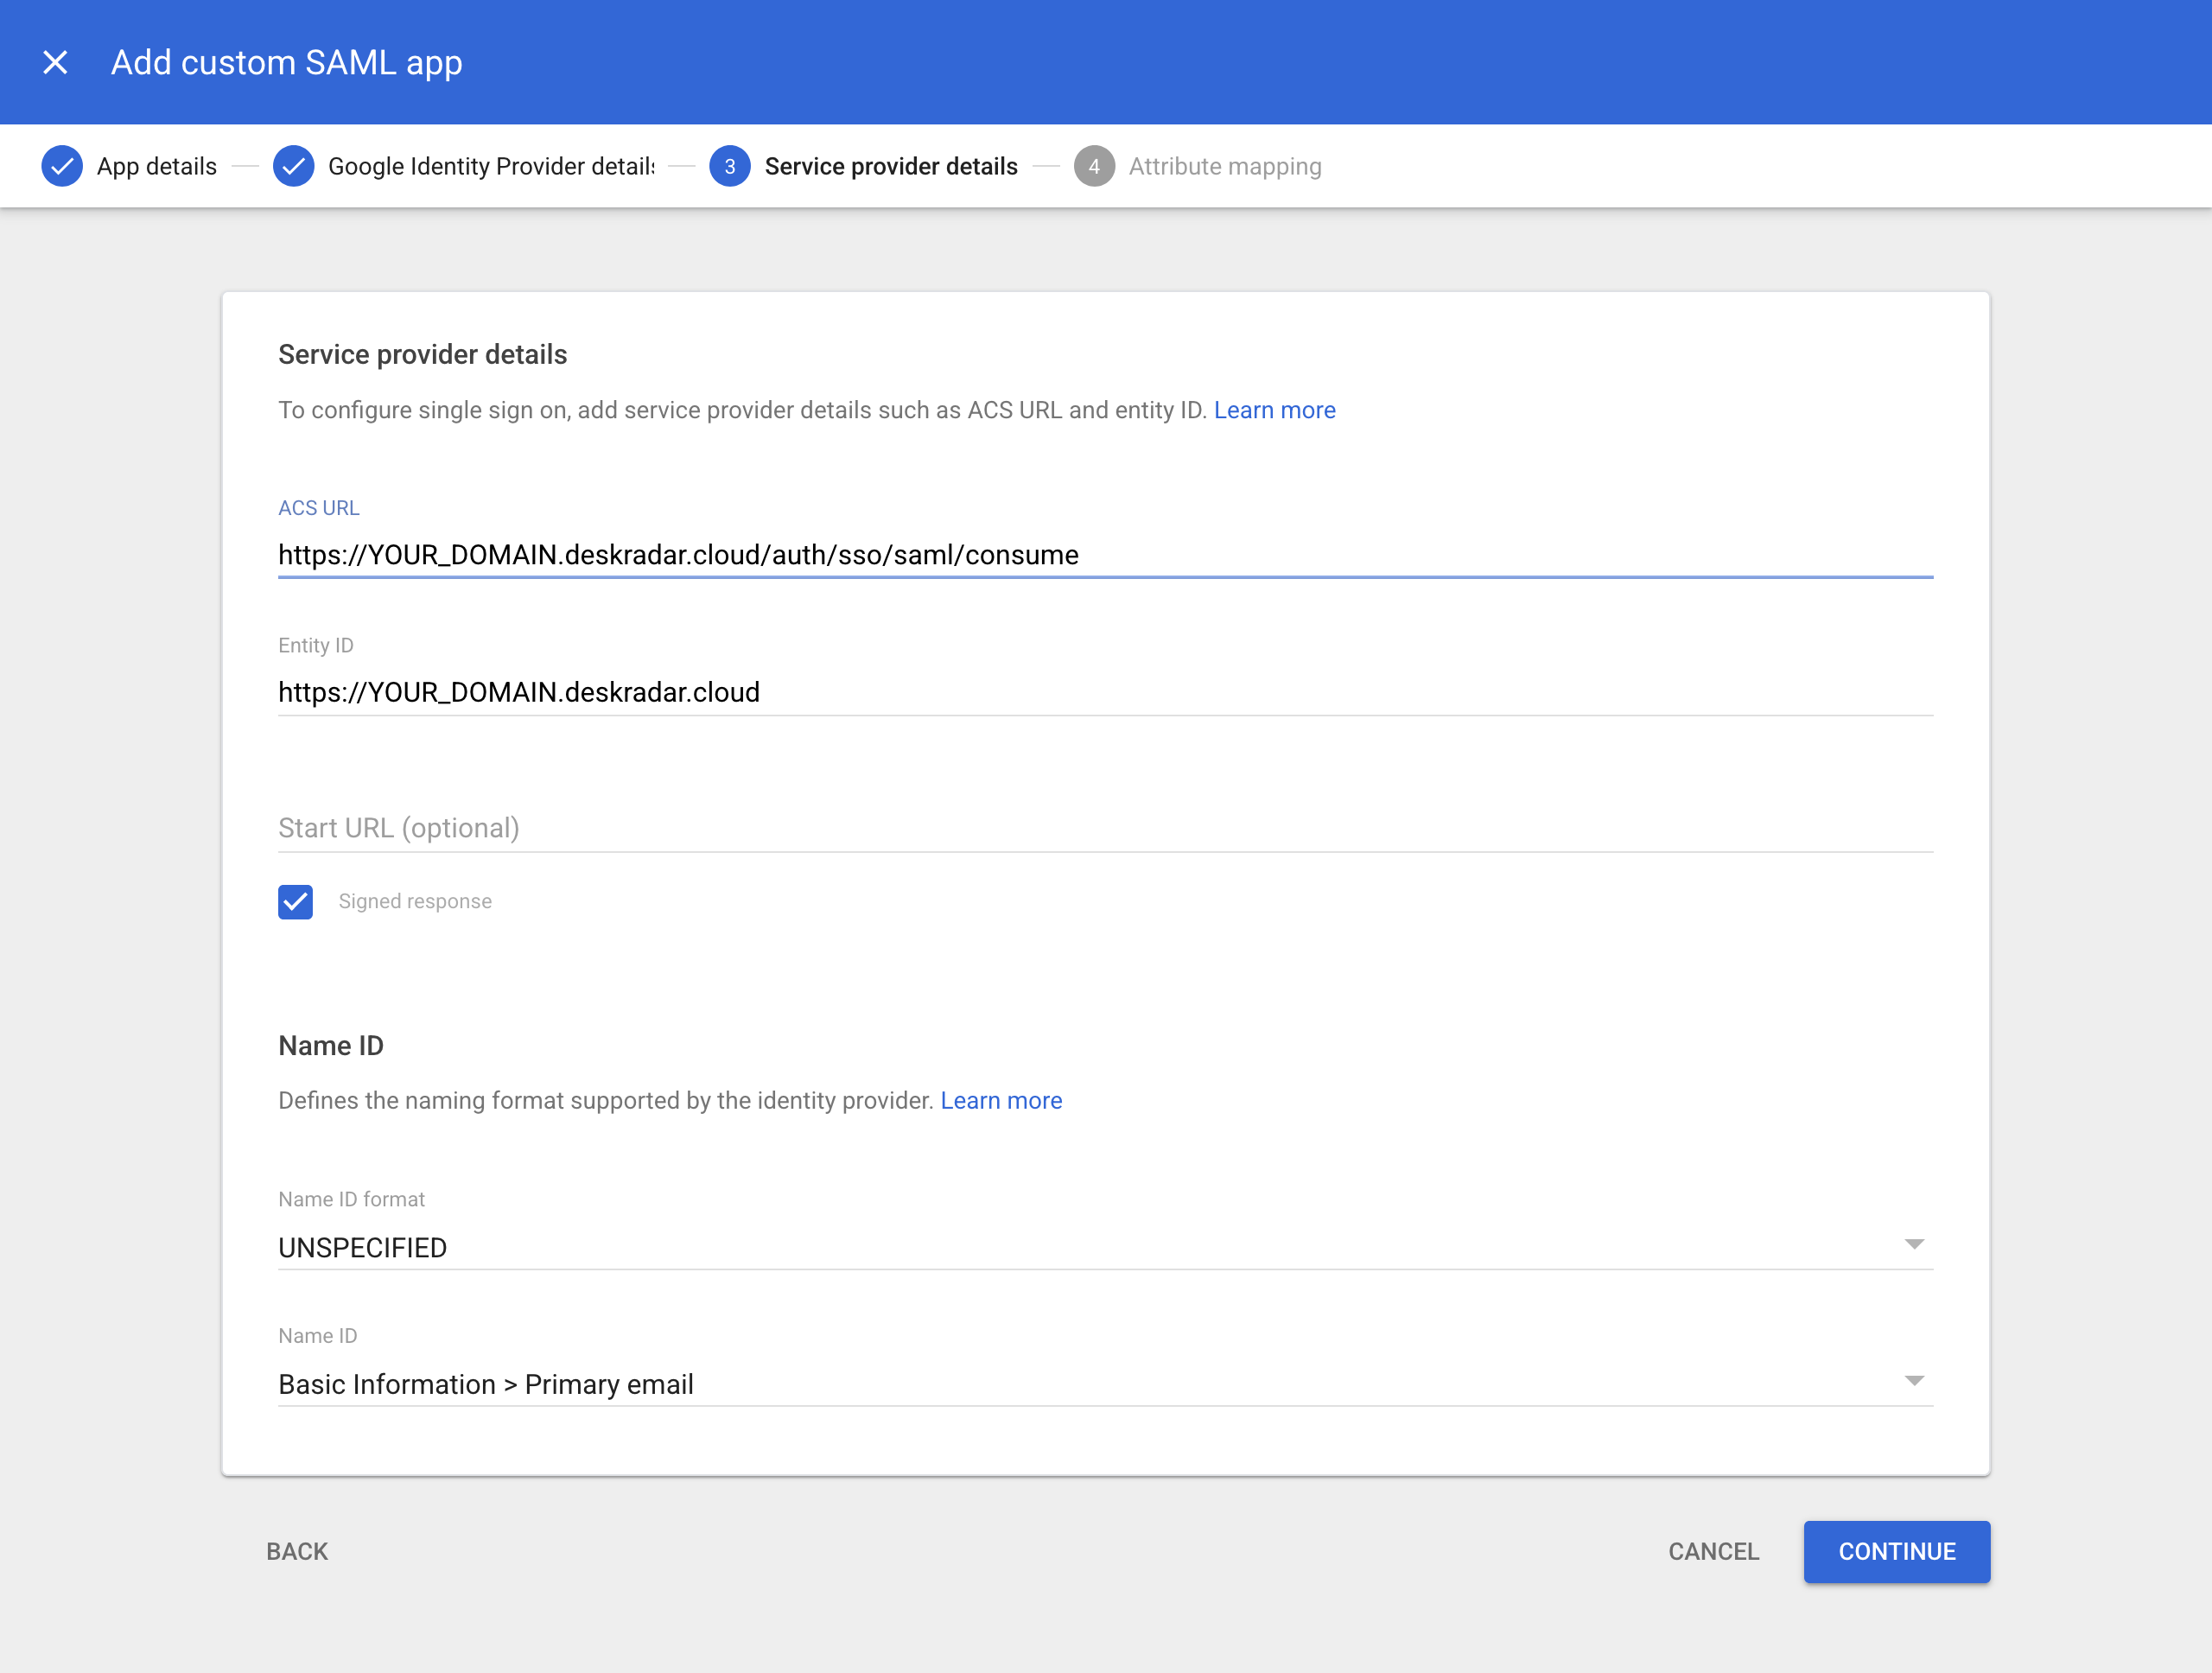
Fill in the form with the following information, replacing YOUR_DOMAIN with your Deskradar instance domain.
- ACS URL (Assertion Consumer Service):
https://YOUR_DOMAIN.deskradar.cloud/auth/sso/saml/consume - Entity ID:
https://YOUR_DOMAIN.deskradar.cloud - Start URL: leave empty
- Signed Response: check this box
- Name ID Format: keep
UNSPECIFIEDselected - Name ID: select
Basic InformationandPrimary Email
Click Continue.
Attribute mapping
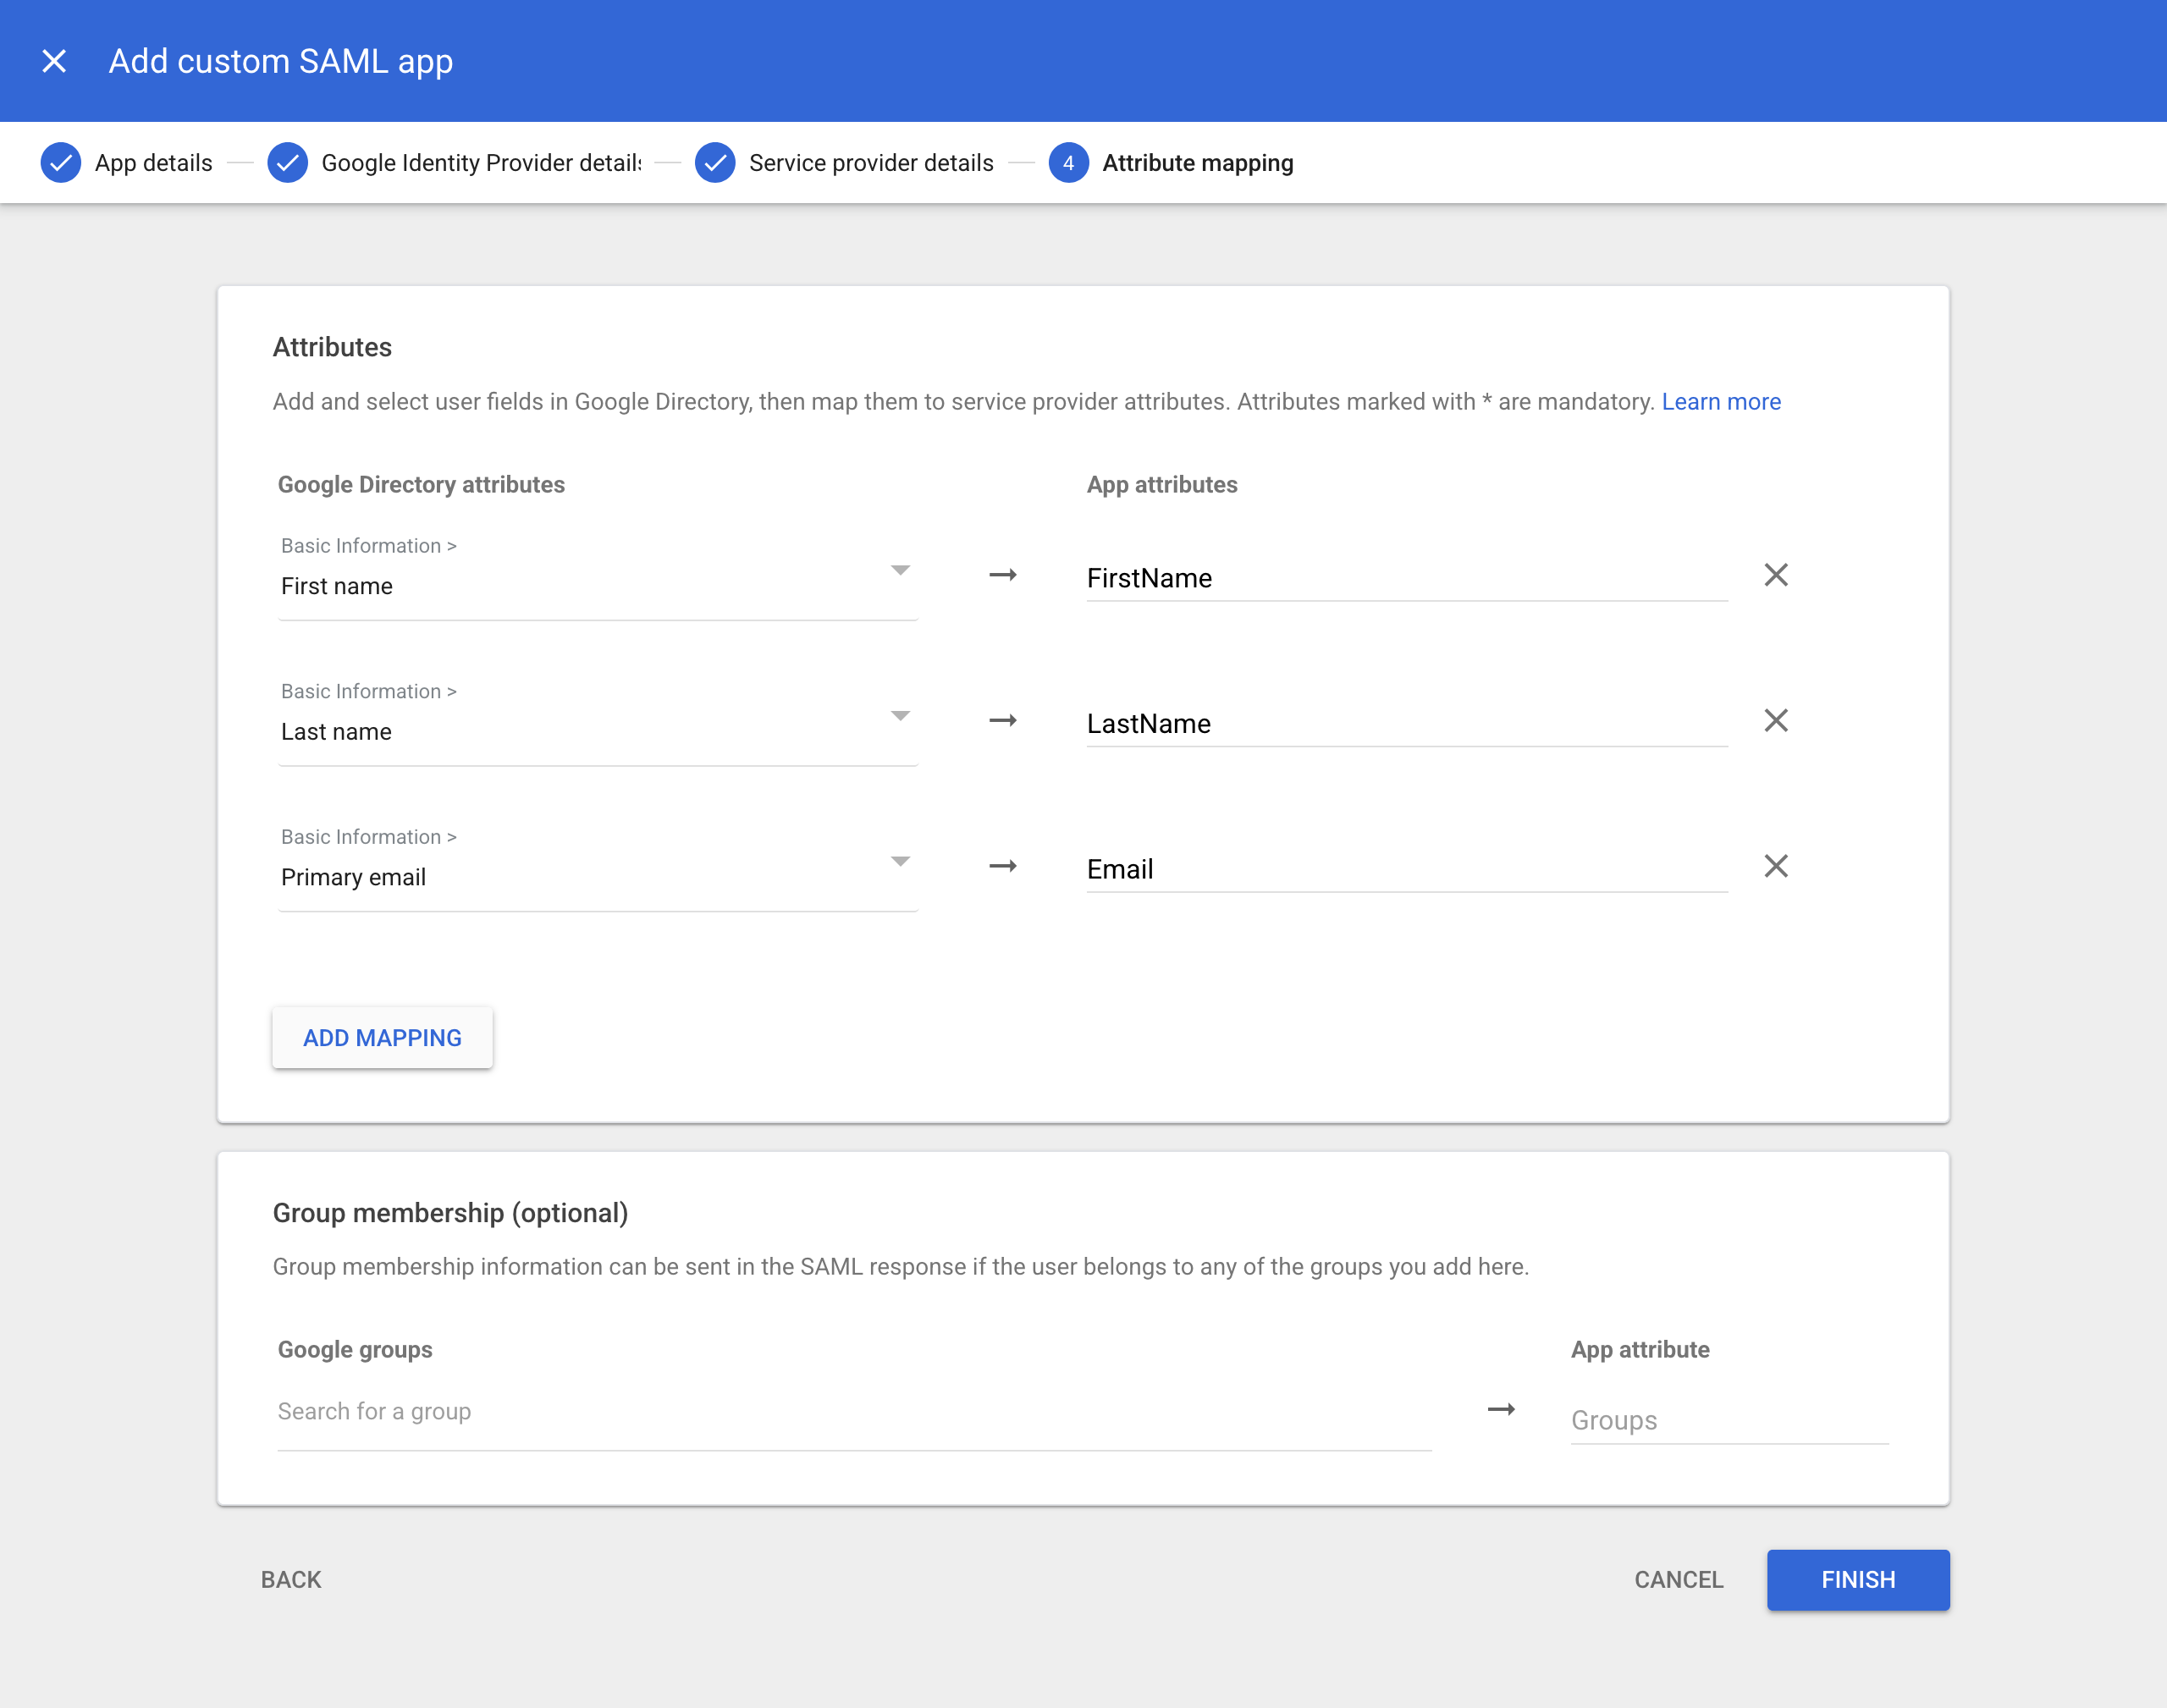
Click the Add mapping button to add 3 mappings:
| User field | Category | Application attribute |
|---|---|---|
| First name | Basic Information | FirstName |
| Last name | Basic Information | LastName |
| Primary Email | Basic Information |
Click Finish.
Enable service
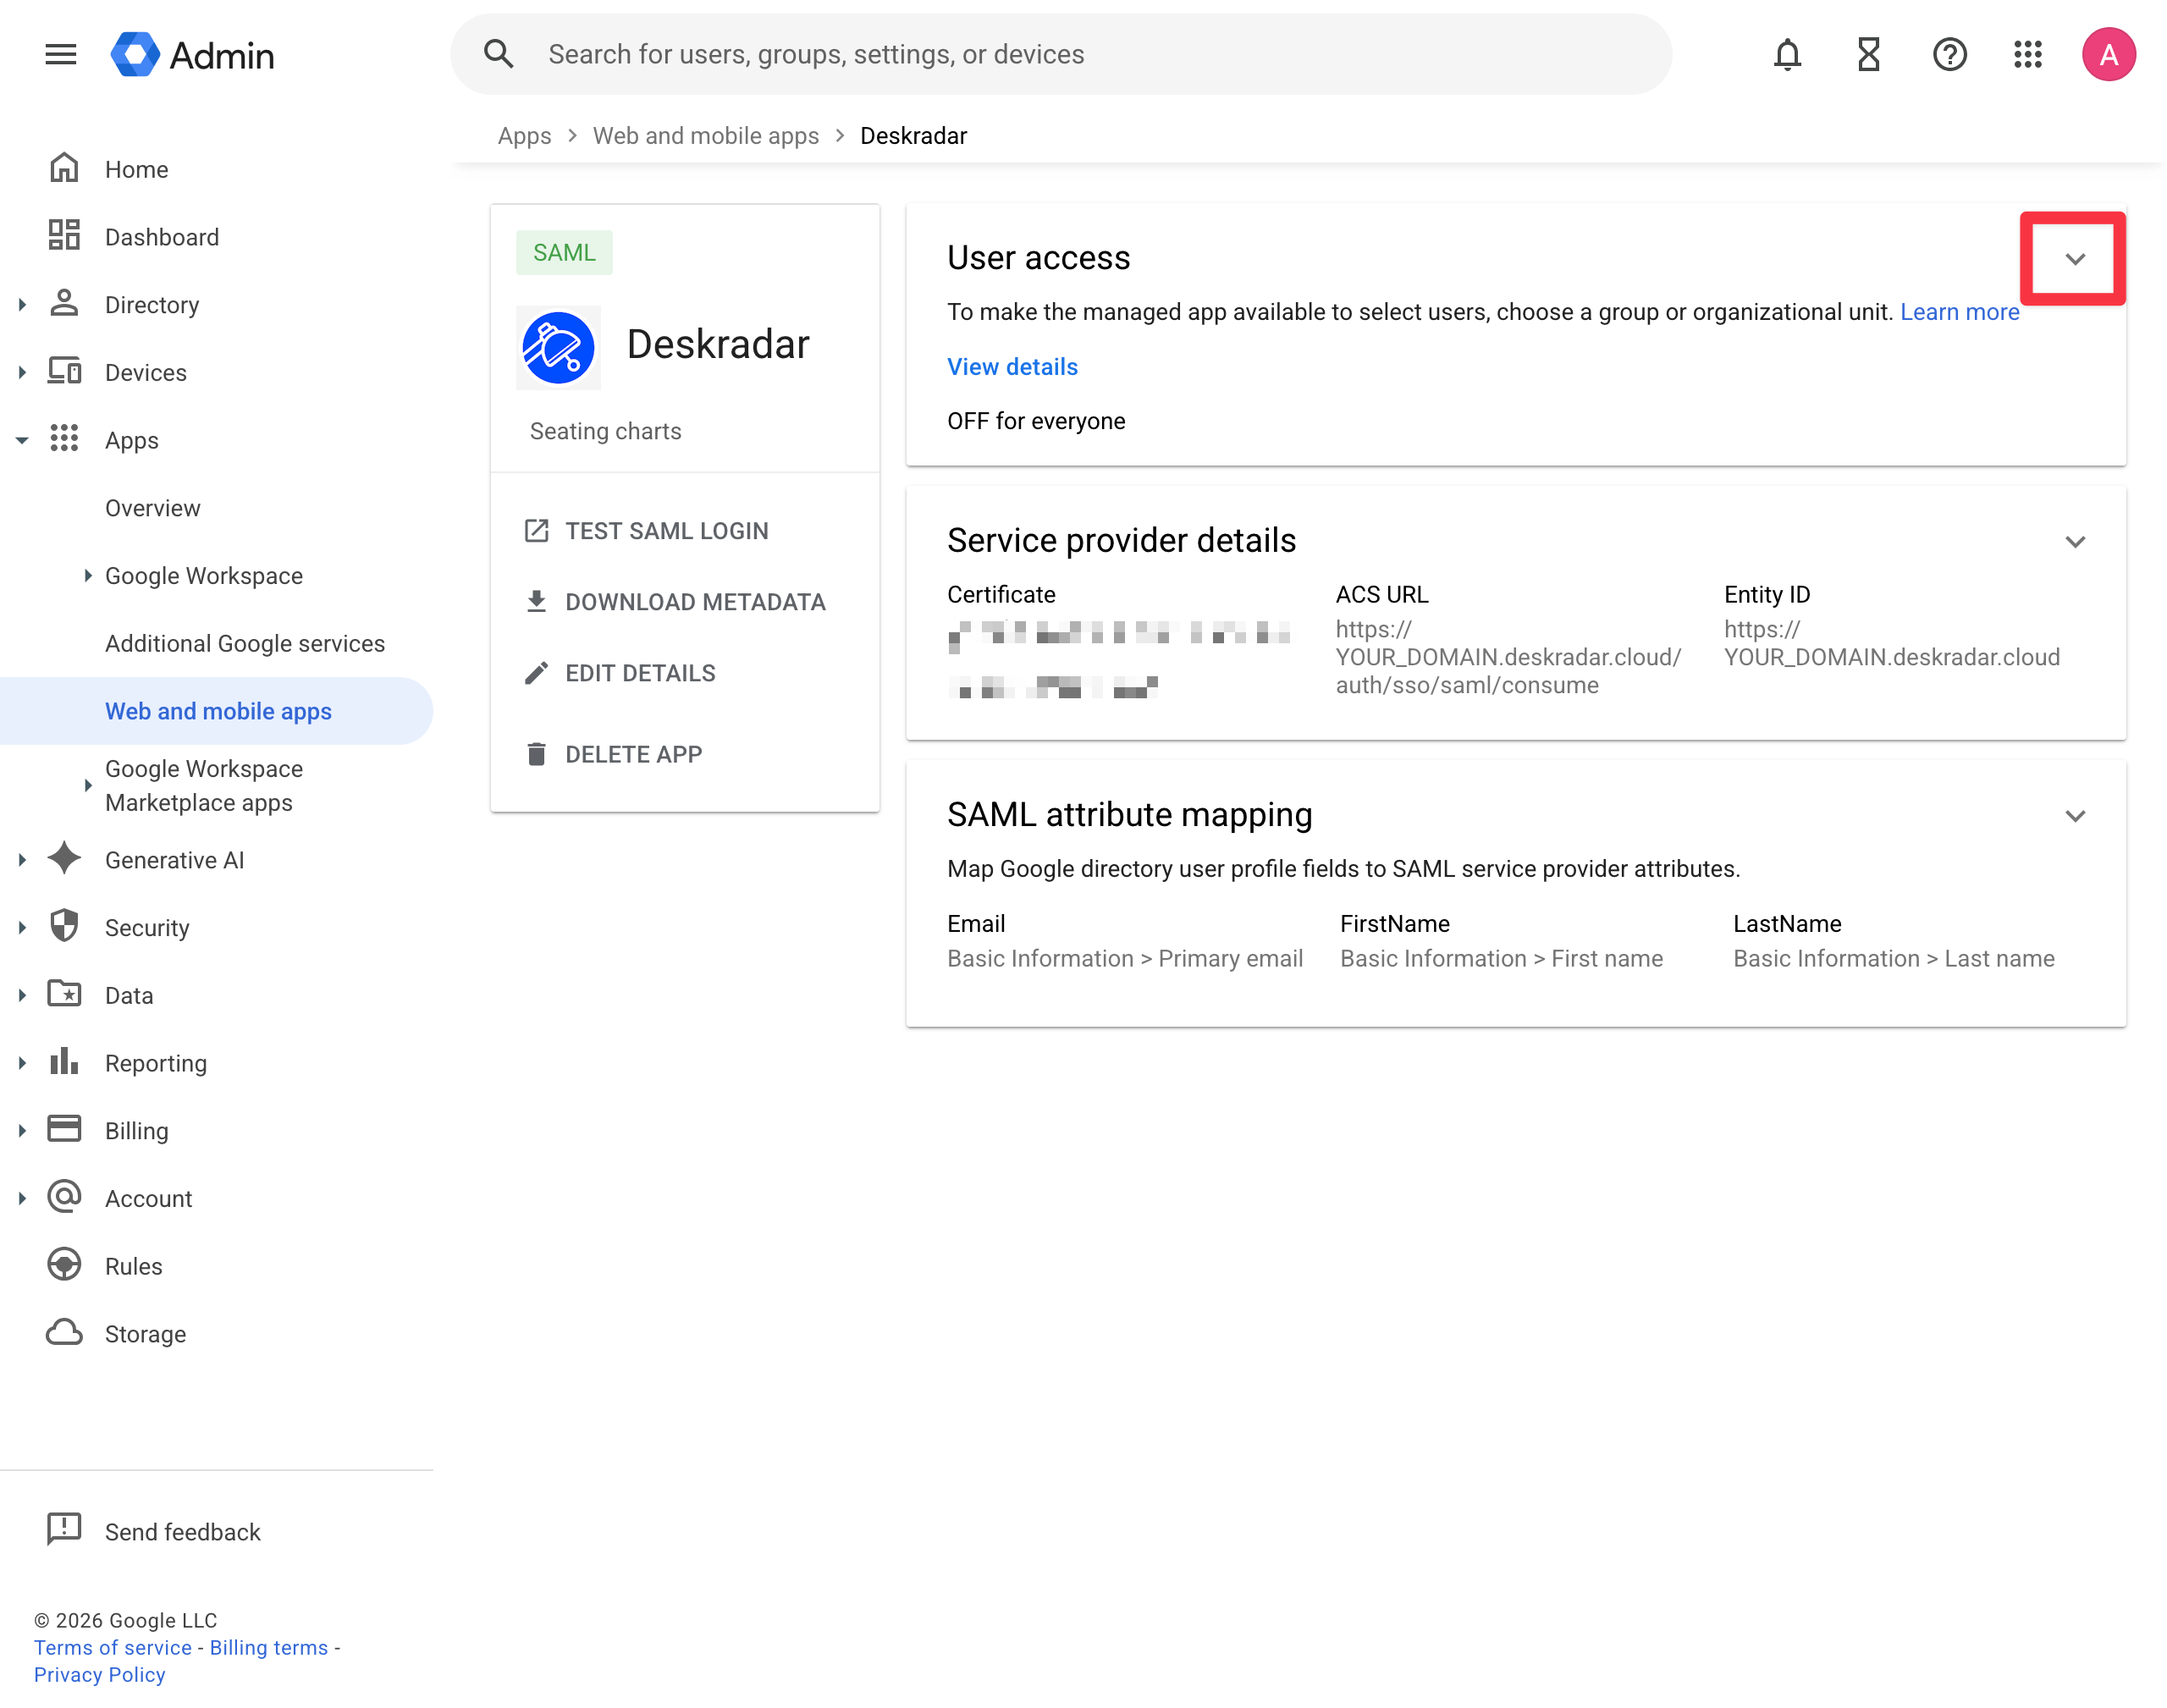
Click the User access box at the top of the page.
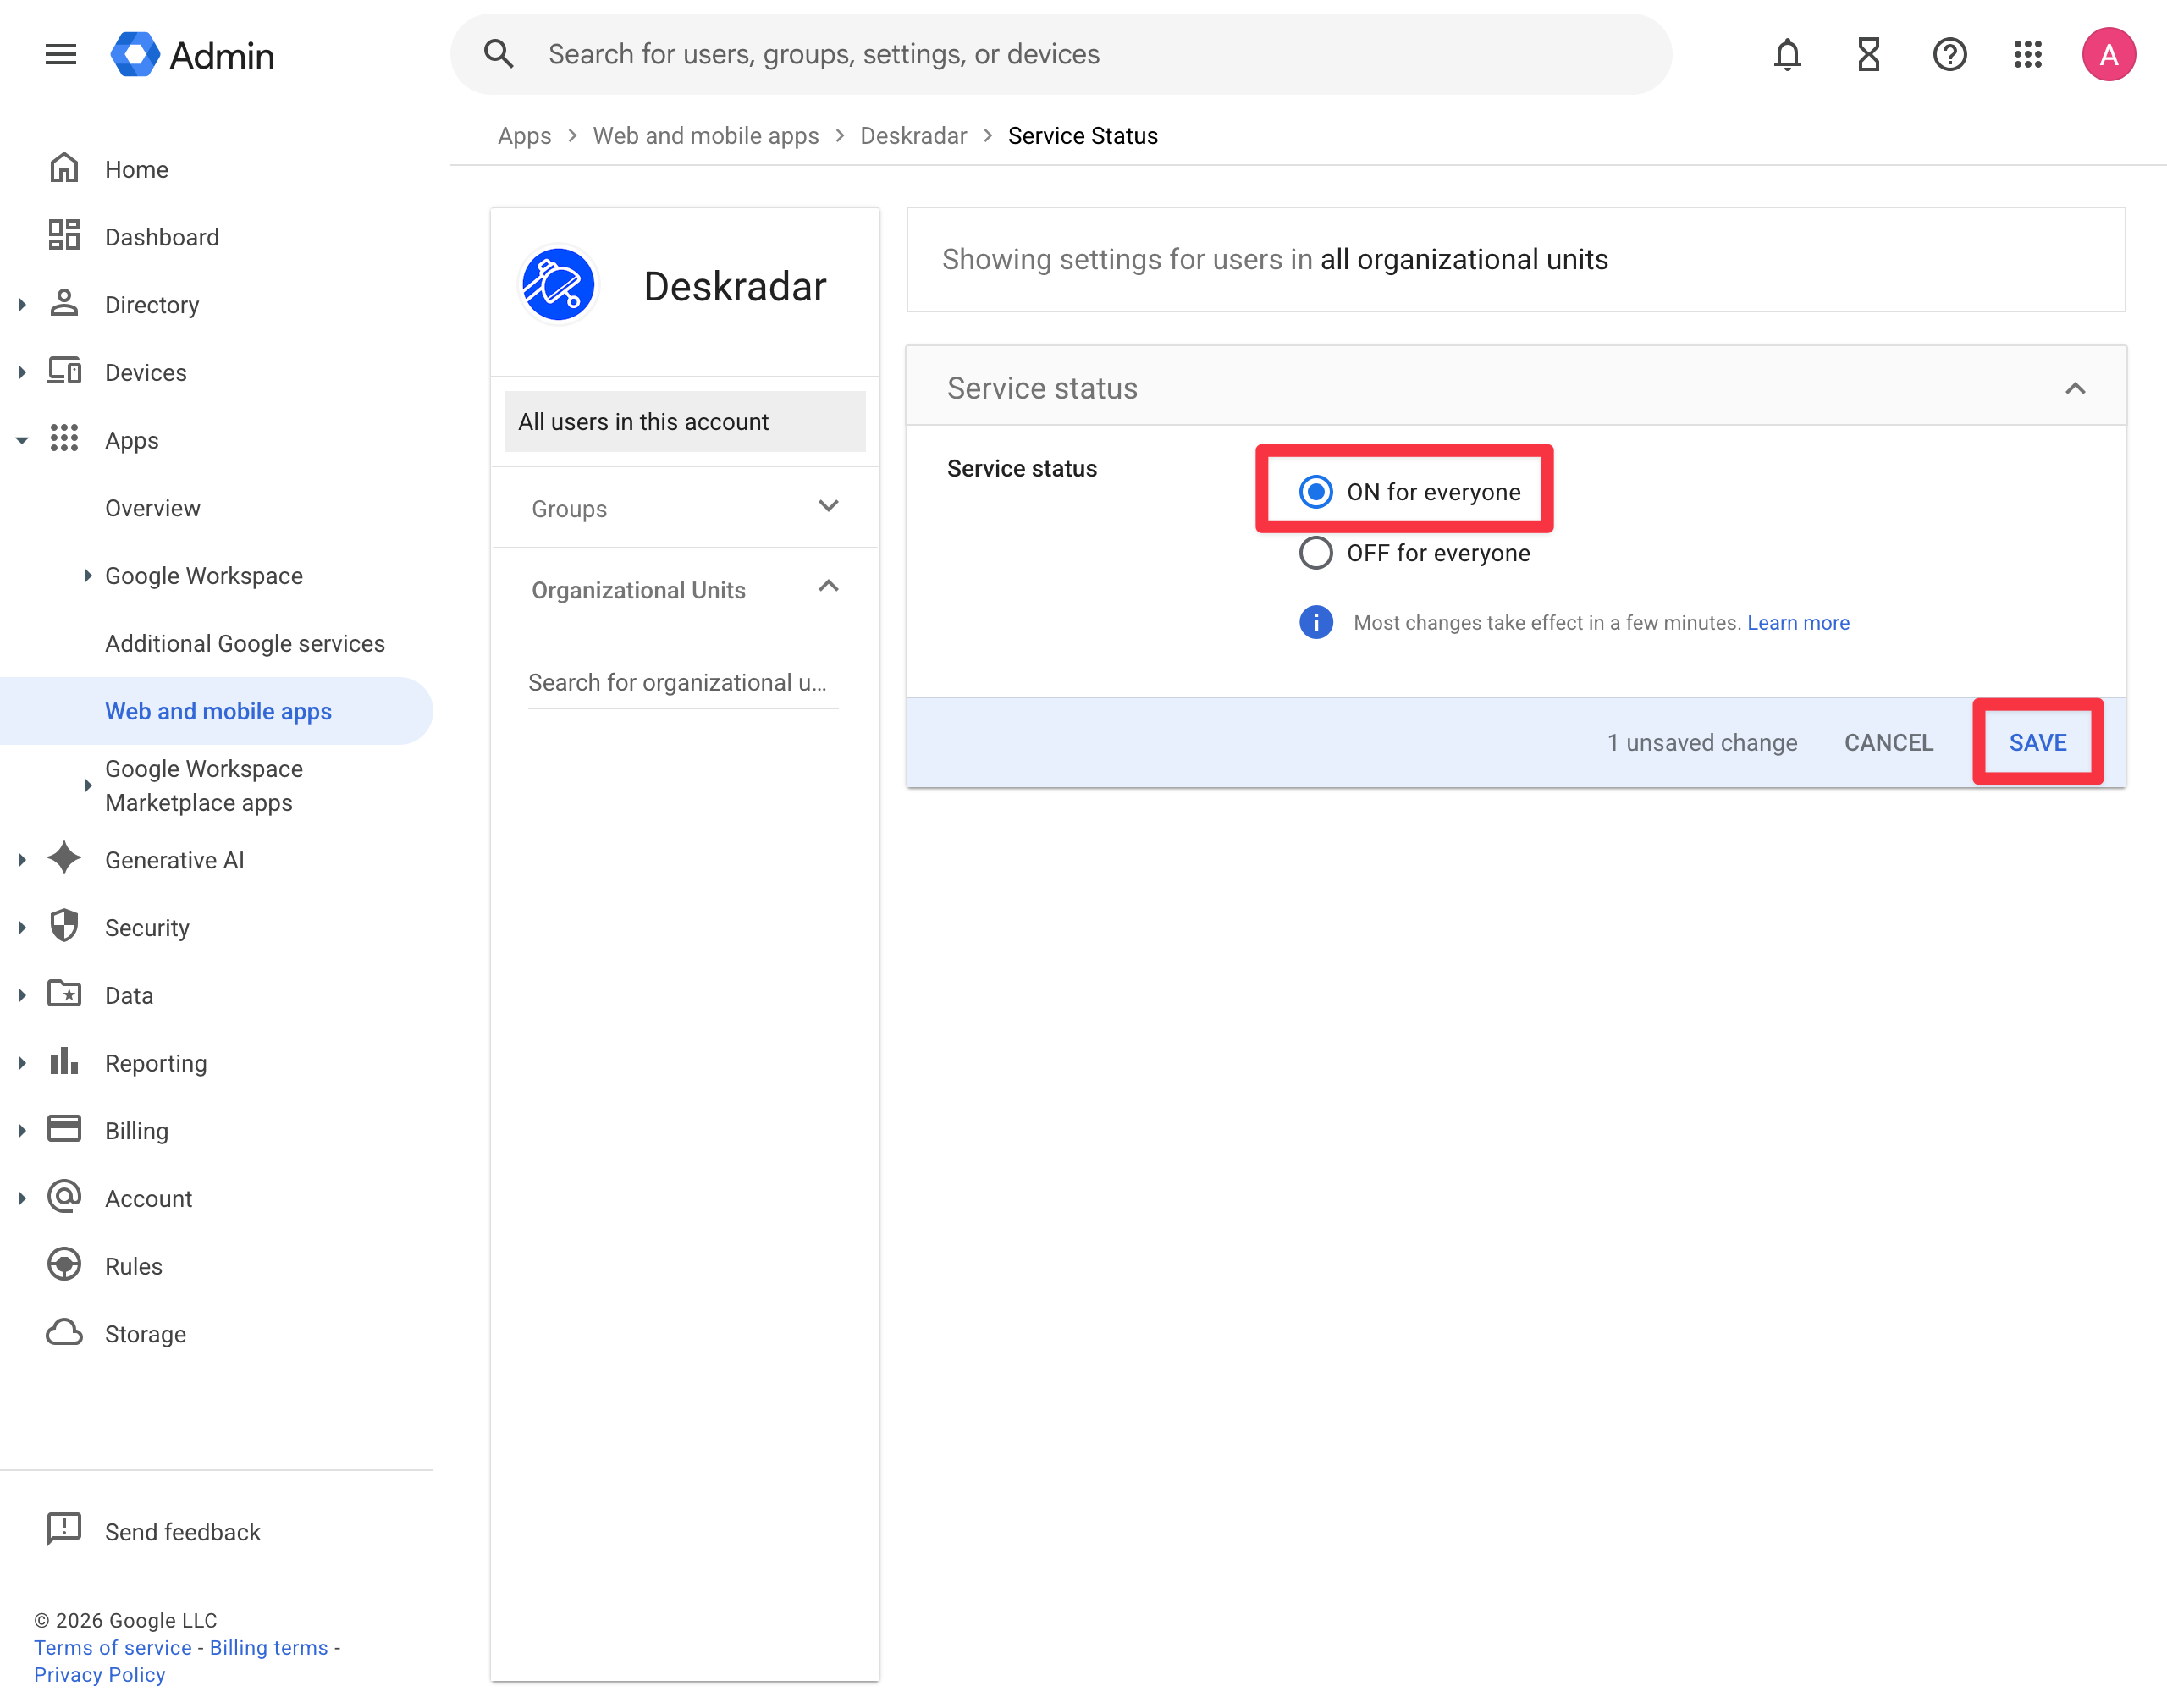
In the Service status box, select ON for everyone.
Click Save.
Deskradar configuration
Log in to your Deskradar workspace with an administrator account using your email and password.
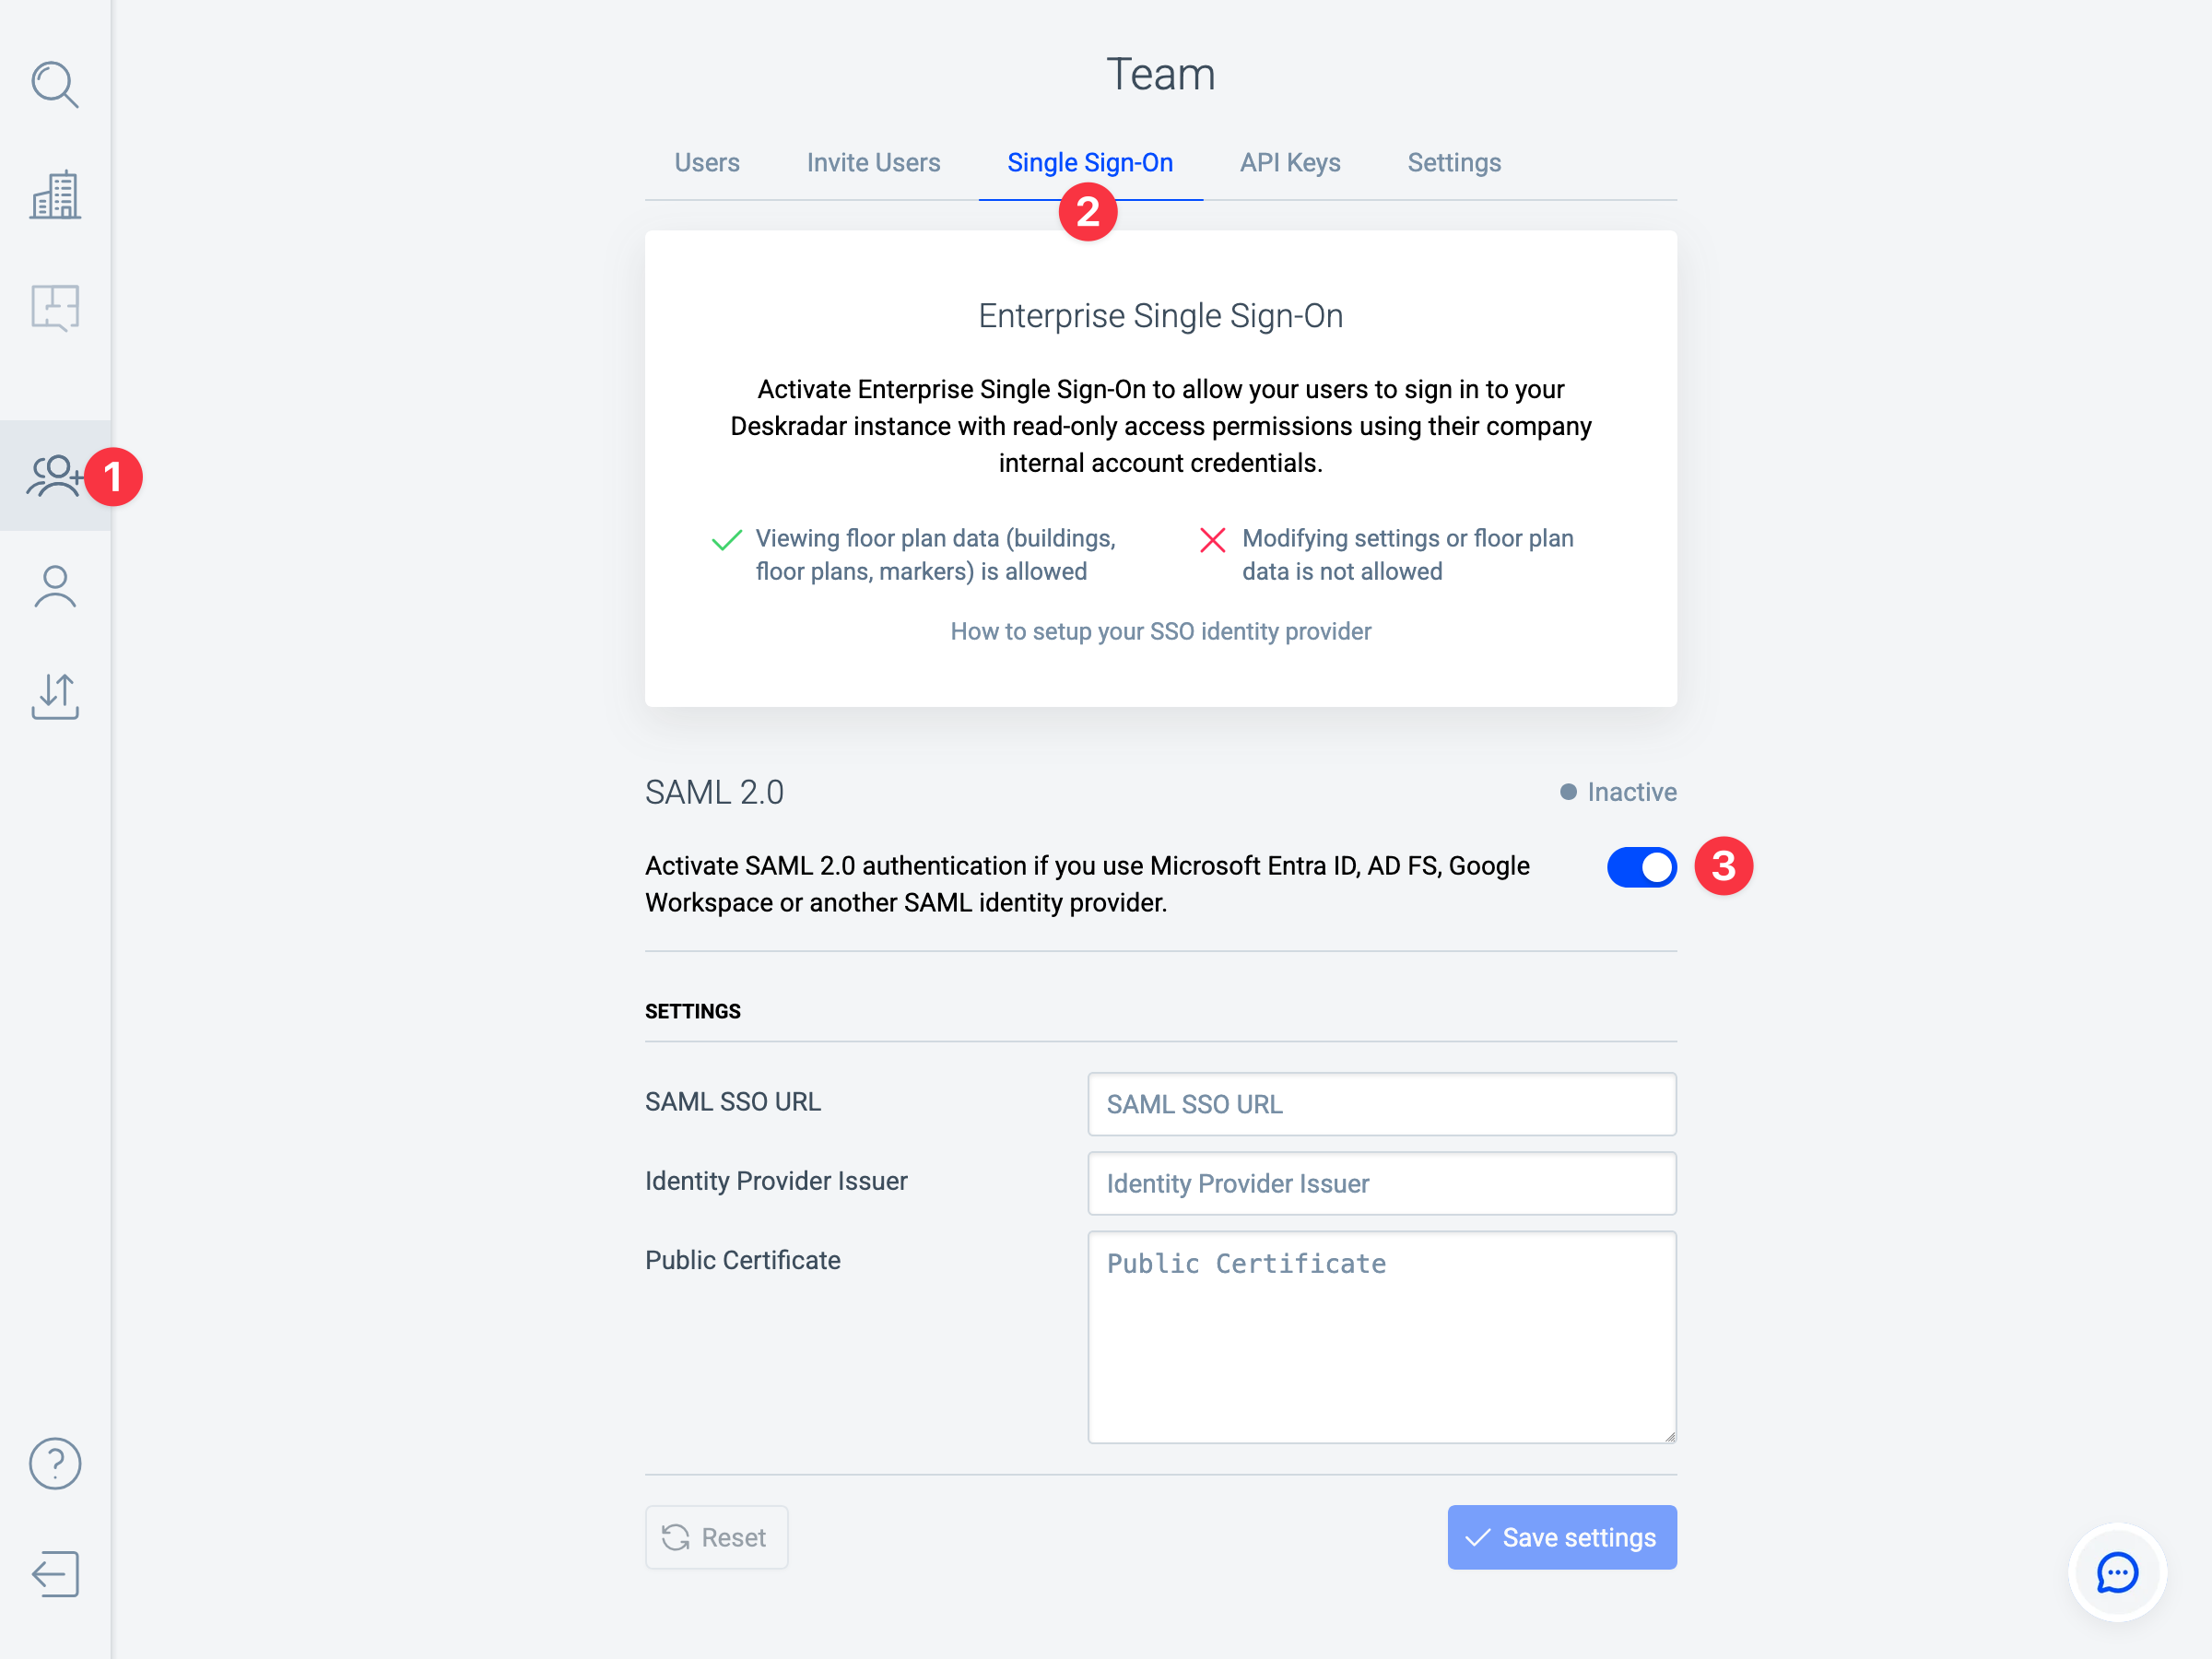
- Open the Team page by clicking the icon in the Sidebar.
- Switch to the Single Sign-On tab.
- Enable the SAML 2.0 authentication method.
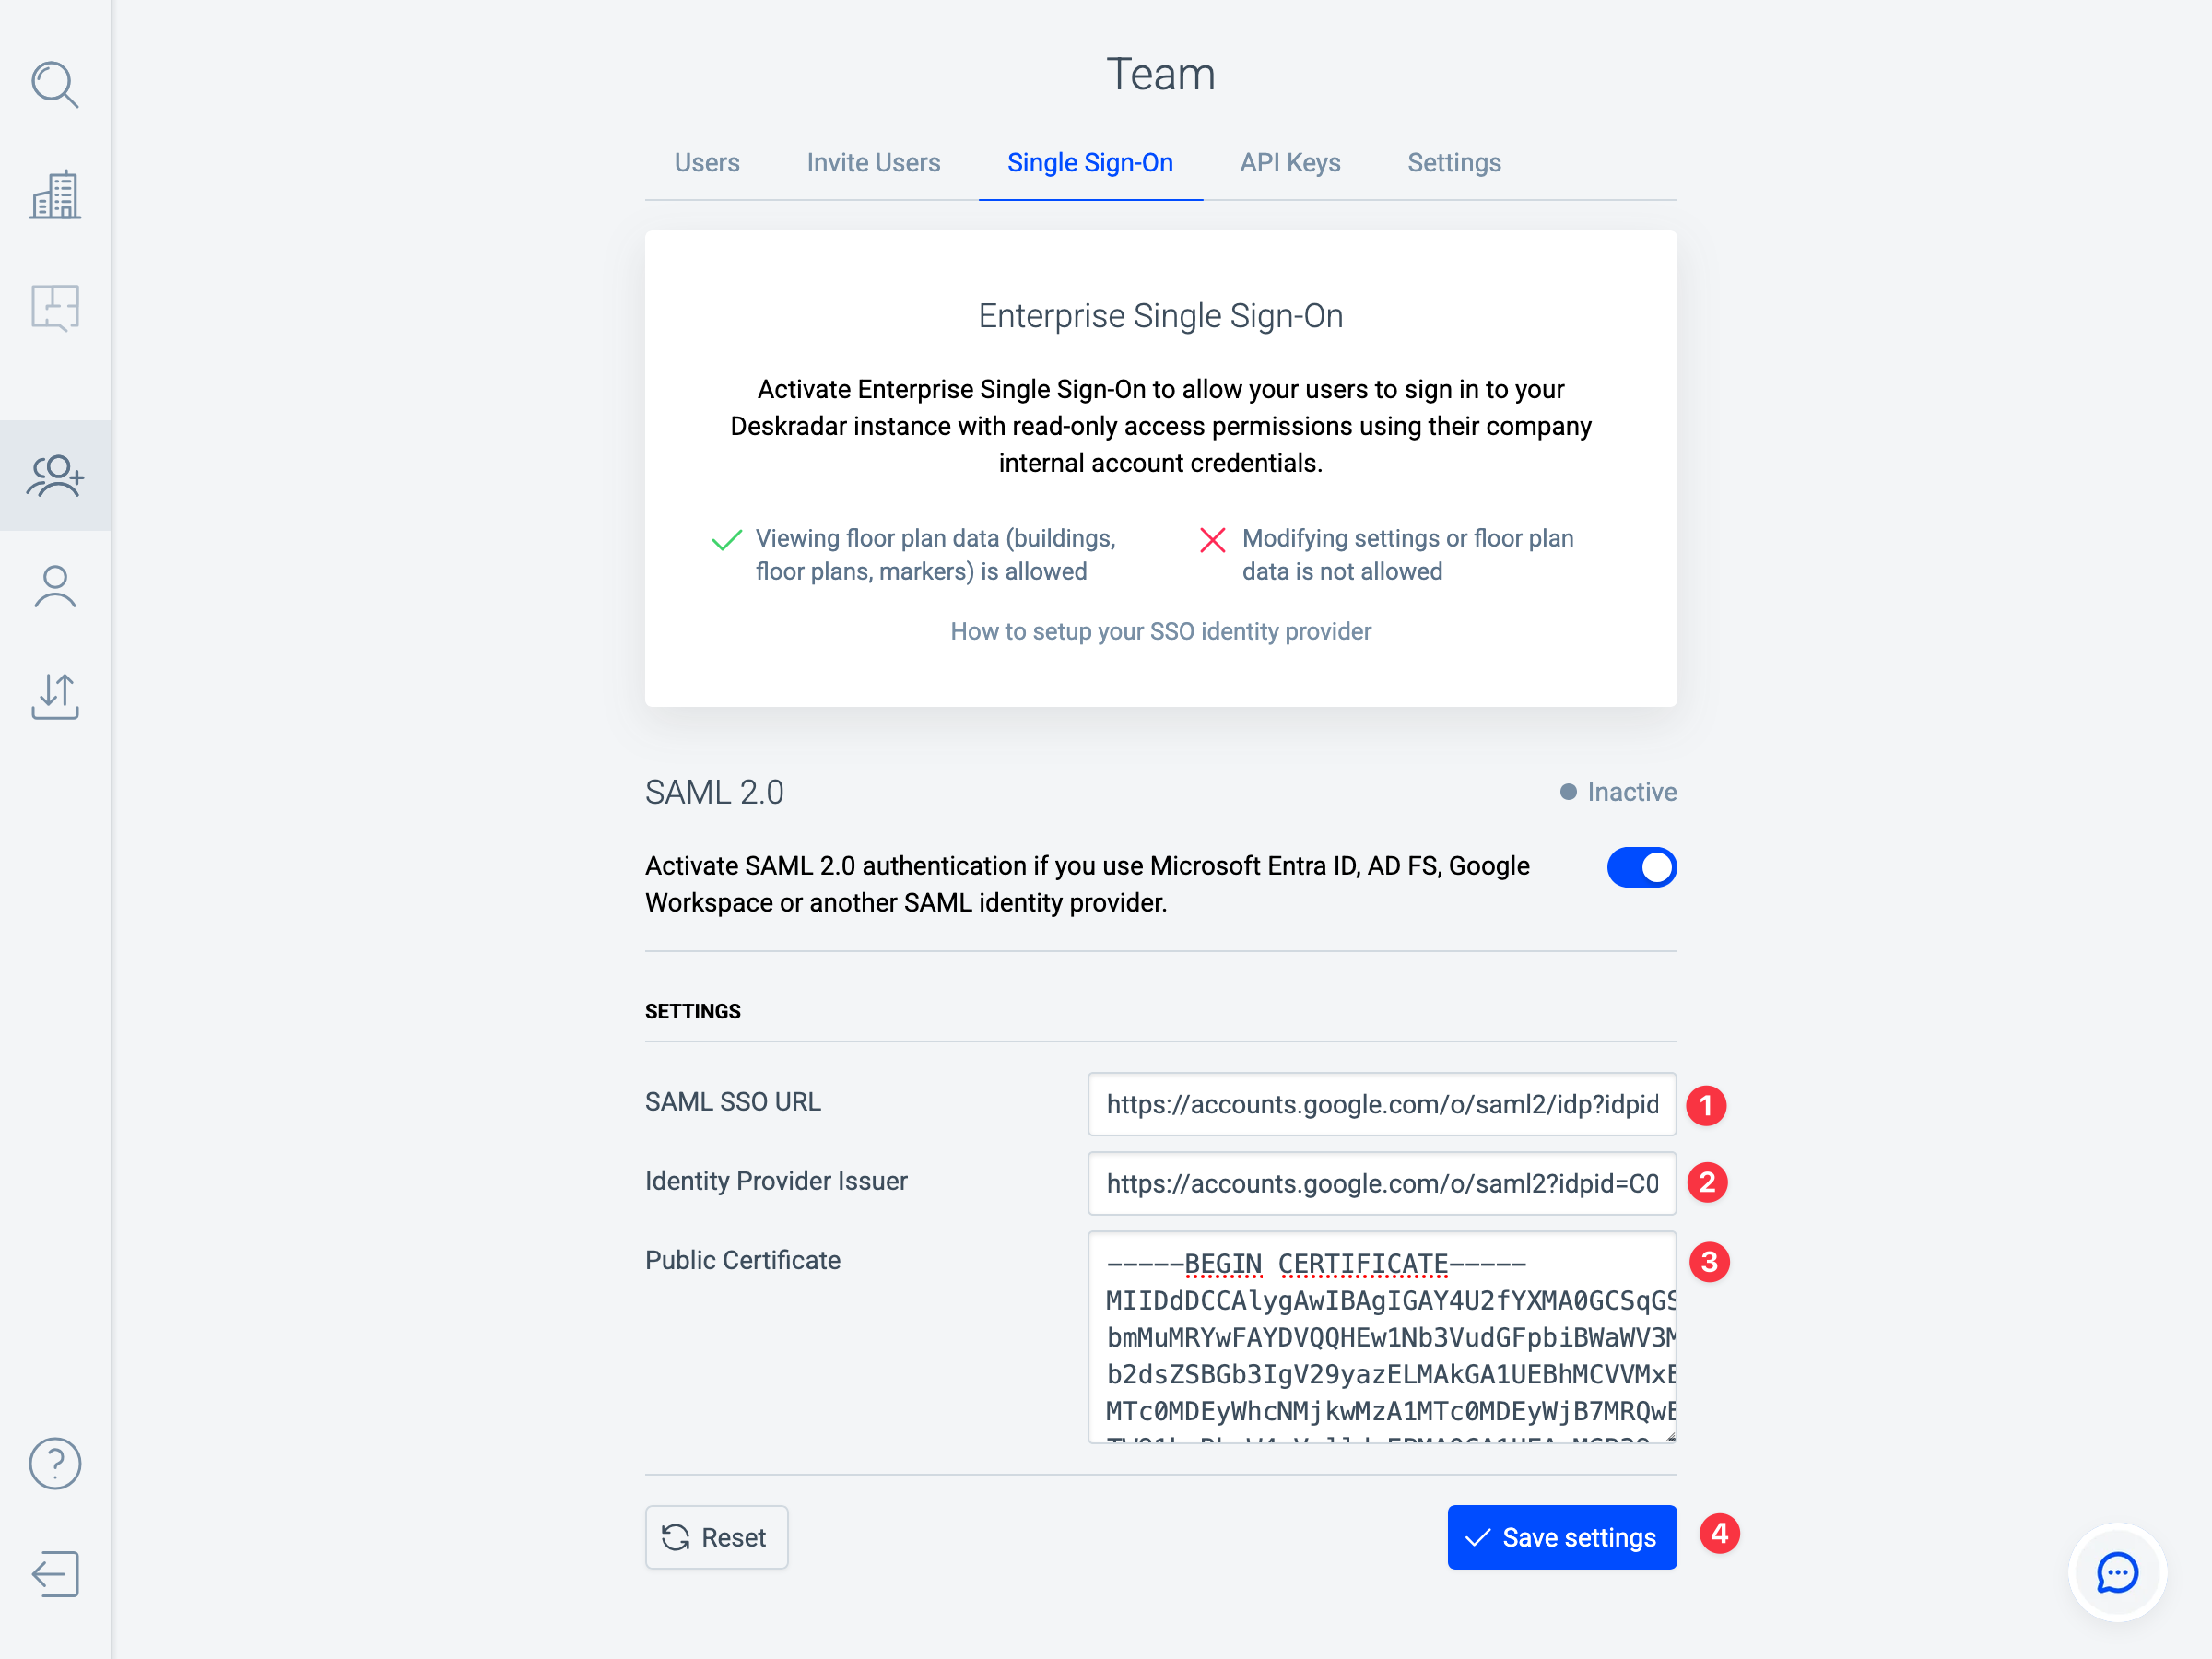
- In the SAML SSO URL field, enter the value you obtained from the SSO URL field in the Google user interface.
- In the Identity Provider Issuer field, enter the value you obtained from the Entity ID field in the Google user interface.
- In the Public Certificate field, paste the certificate contents you obtained from the Certificate field in the Google user interface.
- Click Save settings.
Sign in to Deskradar with SSO
After configuration is complete, users can sign in to Deskradar using their Google work account.
Sign in from Deskradar
Launch your Deskradar instance by opening this URL in your browser: https://YOUR_DOMAIN.deskradar.cloud (replace YOUR_DOMAIN with your Deskradar instance domain). Click Enterprise Single Sign-On.
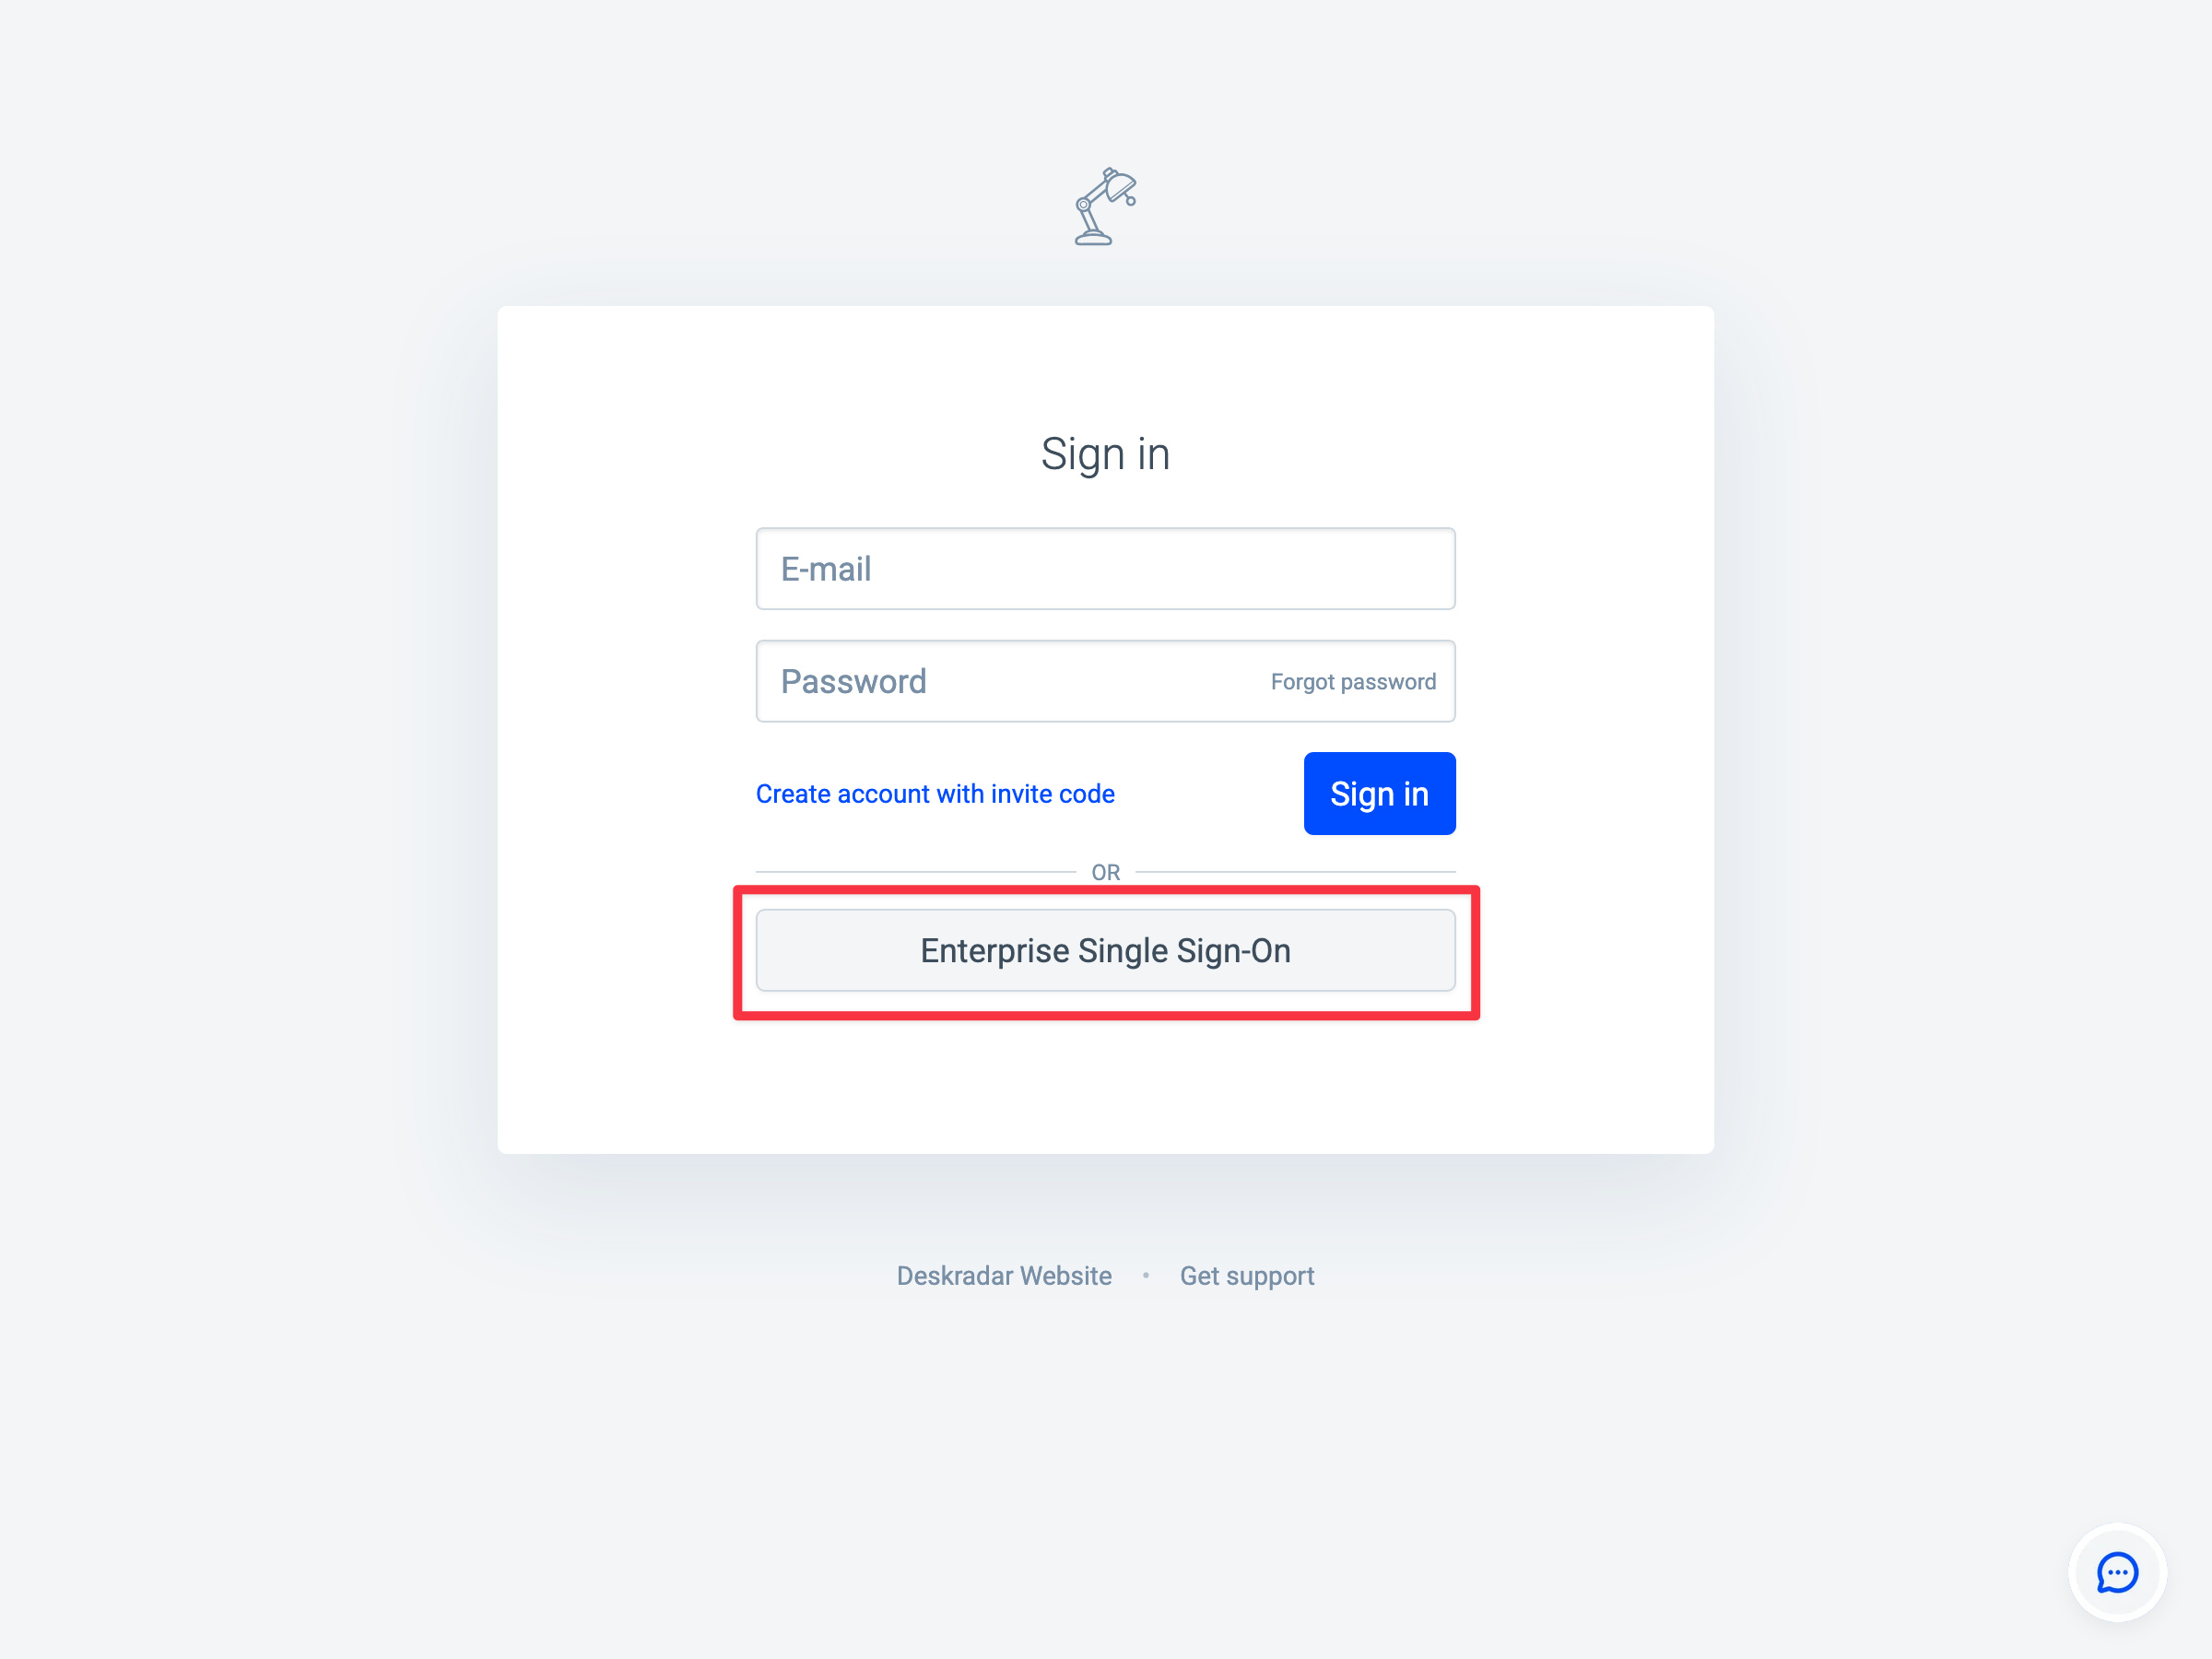
- You will be signed in to Deskradar directly if you’re already signed in on Google Workspace.
- You will be redirected to the Google Workspace sign-in form if you’re not signed in yet. Enter your work account credentials there to sign in.
- Upon successful sign-in with your work account credentials, you will be taken back to Deskradar and signed in.
Sign in from a Google app
Launch any Google Workspace application and sign in with your domain credentials.
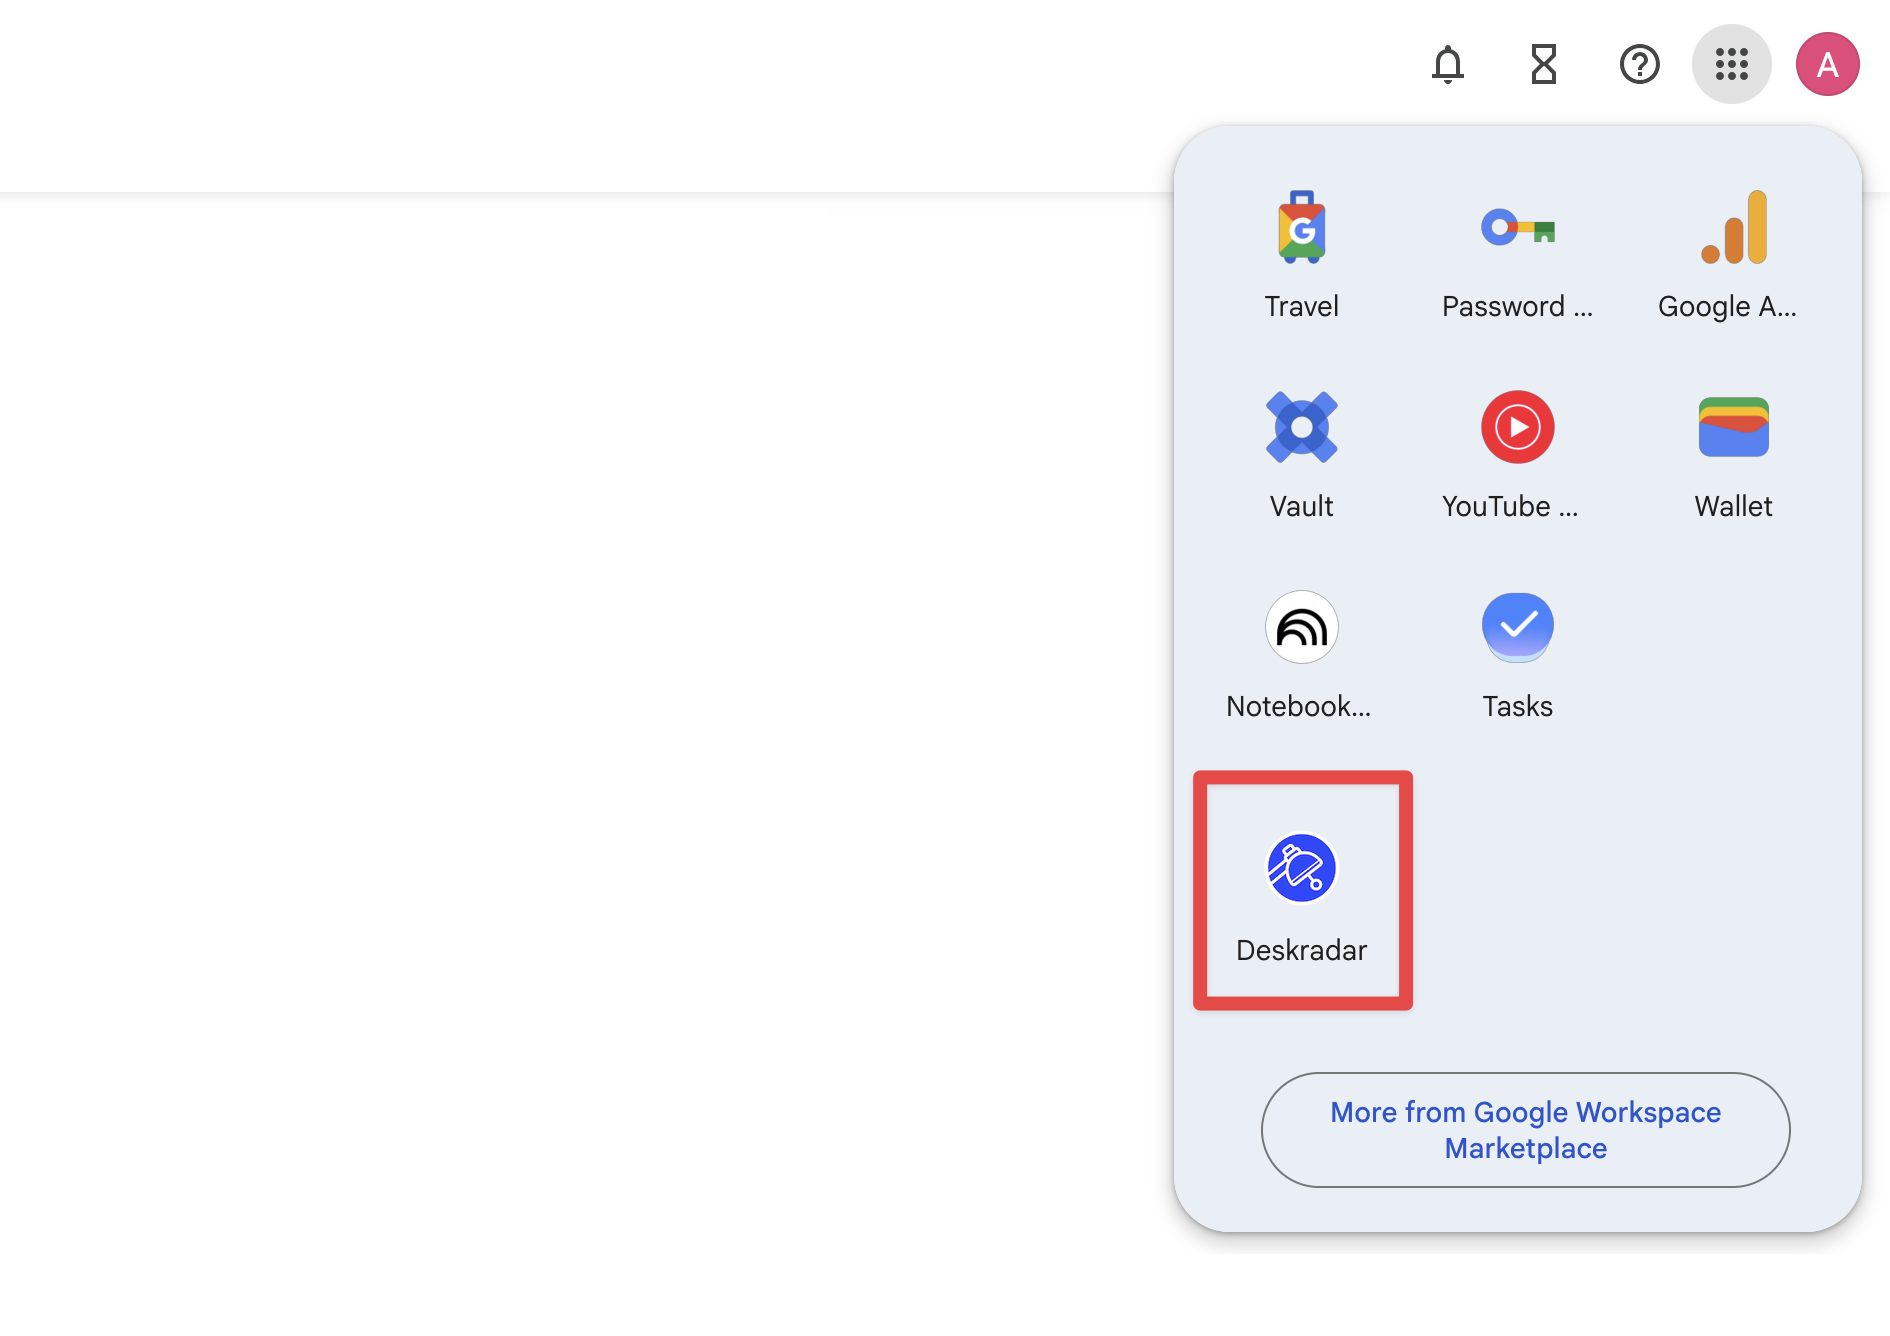
Click the Apps icon.
Click the Deskradar icon.