Appearance
Single Sign-On with Okta
This guide demonstrates how to configure single sign-on with Okta.
Okta Configuration
Okta documentation provides own guide for integrating SAML 2.0 applications: https://developer.okta.com/docs/guides/saml-application-setup/overview/
Sign in to your Okta organization as a user with administrative privileges.
Add SAML App
- In the main navigation on the left hand side, click Applications > Applications.
- Click Create App Integration.
- In the Create a New Application Integration dialog box, select SAML 2.0 and click Next.
Create SAML Integration: General Settings
- App name Deskradar
- Upload Deskradar logo into the field App logo.
- Click Next.
Create SAML Integration: Configure SAML
- Set Single sign-on URL:
https://YOUR_DOMAIN.deskradar.cloud/auth/sso/saml/consumeReplaceYOUR_DOMAINwith your Deskradar instance domain. - Set Audience URI (SP Entity ID):
https://YOUR_DOMAIN.deskradar.cloudMake sure you specify the value exactly. Protocol has to behttps, there must be no trailing slash or any other additions at the end. - Leave Default RelayState blank.
- Leave Name ID Format set to Unspecified.
- Set Application username to Email.
- In the section Attribute Statements define following attributes:
| Name | Name format | Value |
|---|---|---|
| Unspecified | user.email | |
| FirstName | Unspecified | user.firstName |
| LastName | Unspecified | user.lastName |

- Click Next.
- Click Finish.
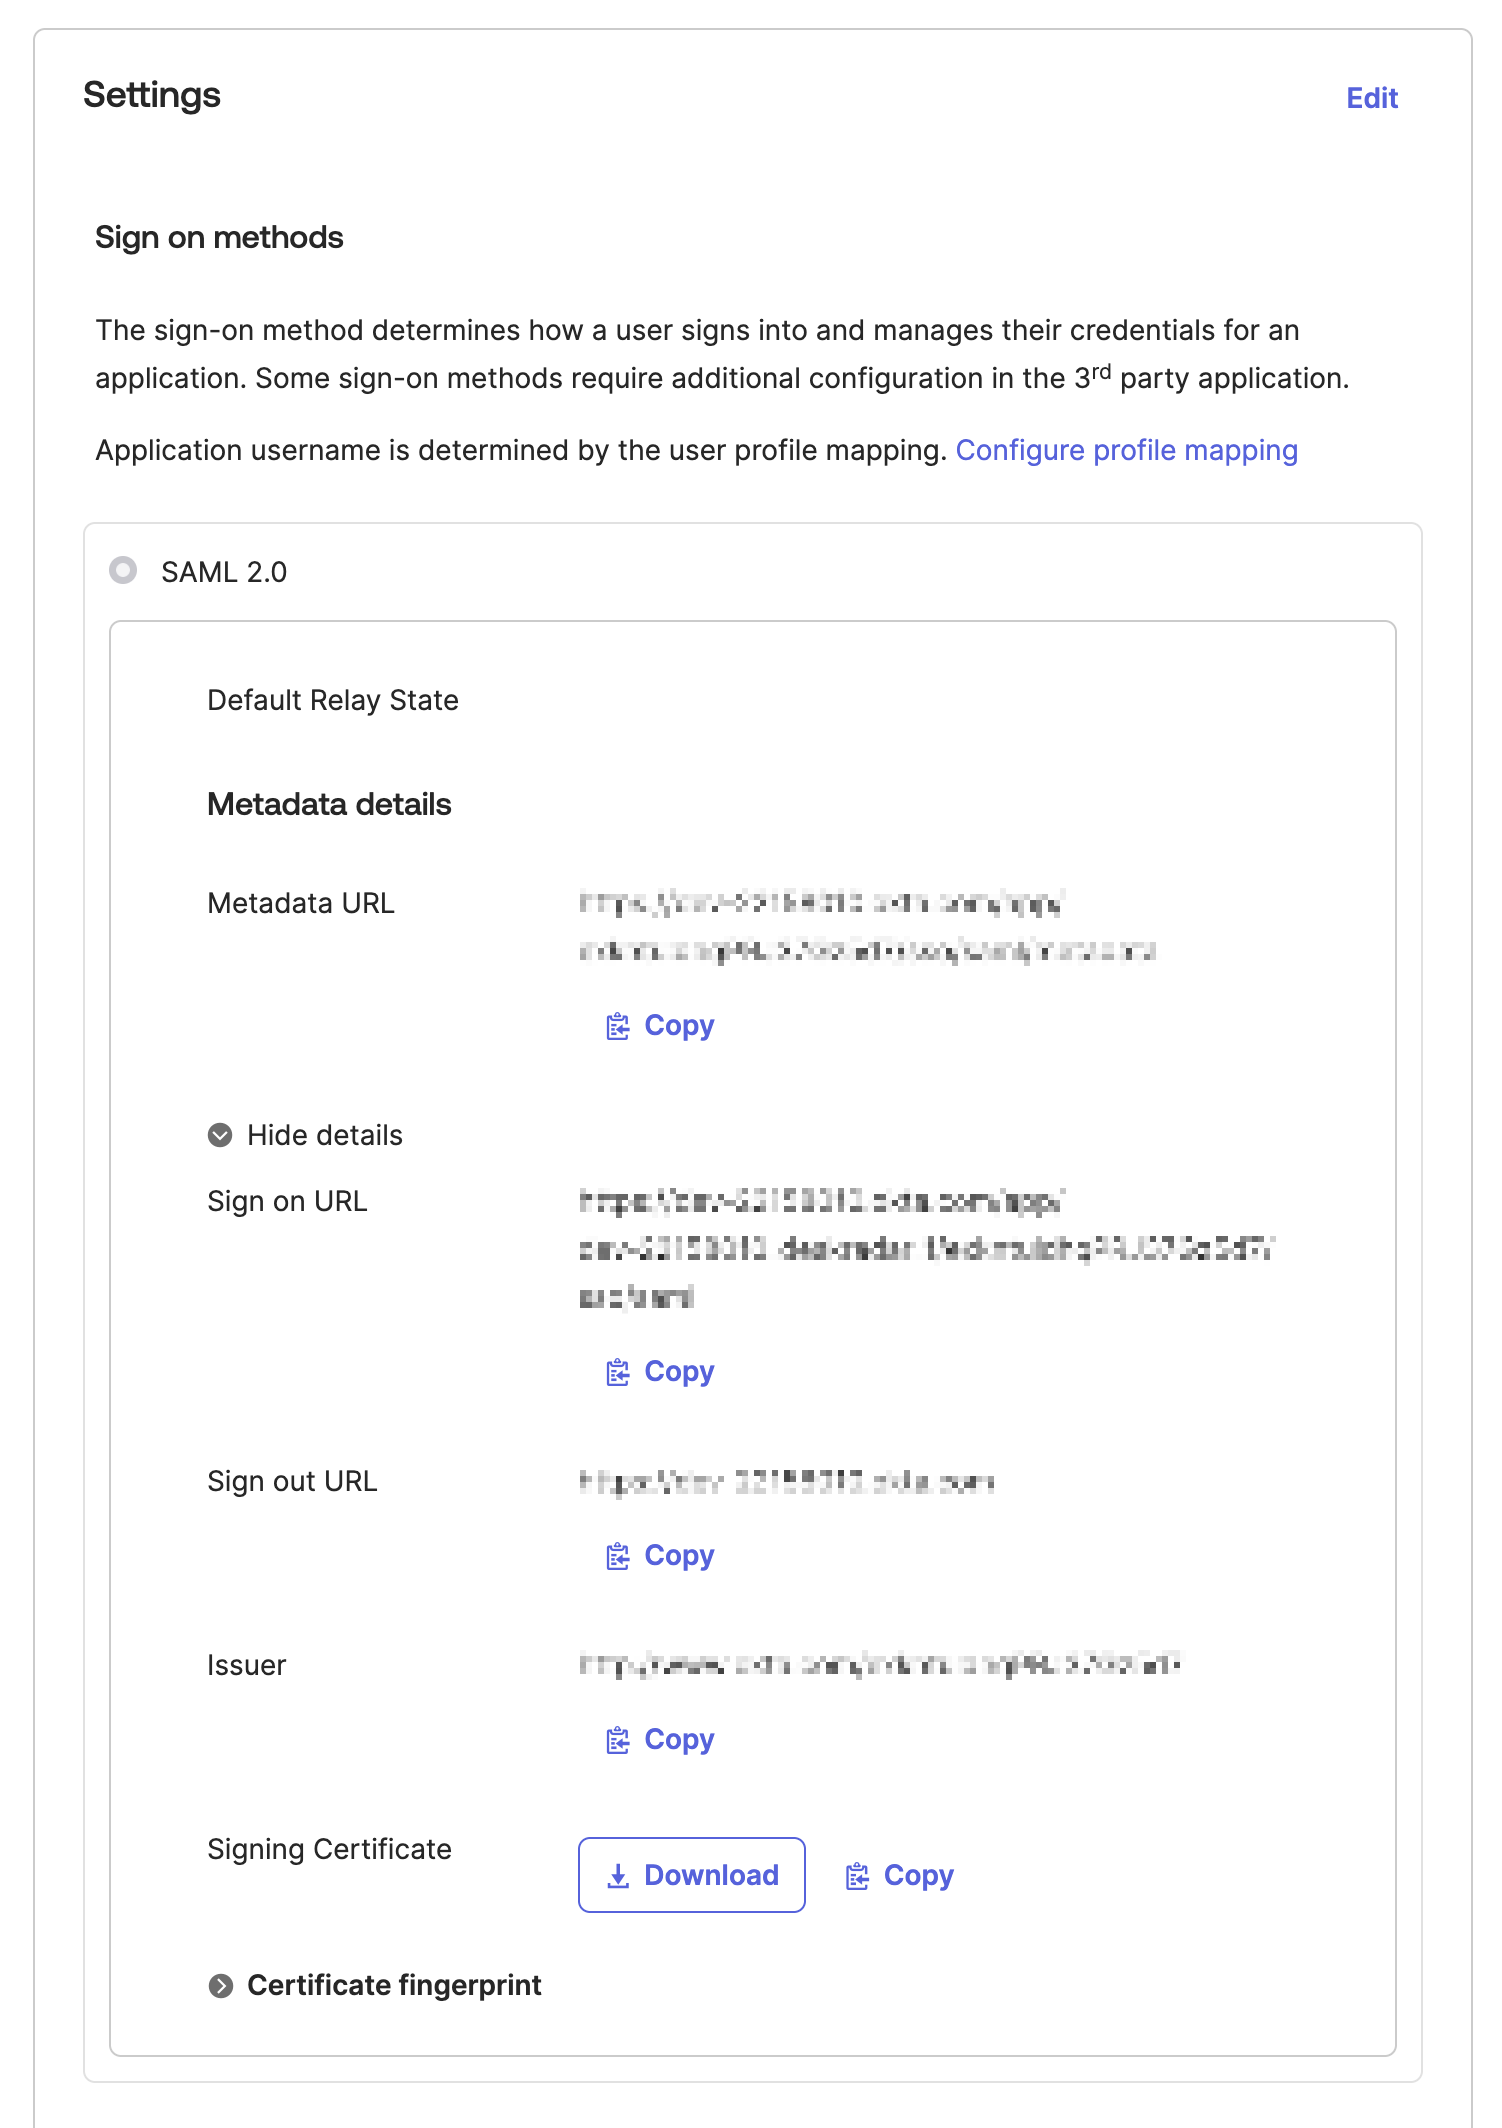
SAML Settings
Expand SAML settings box by clicking More details.
Take a note of the contents of the fields Sign on URL, Issuer.
It is important to download Signing Certificate as a file.
Deskradar Configuration
- Sign in to Deskradar with email and password as a user with an Administrator role.
- Open Team panel by clicking the icon in the Sidebar.
- Switch to Single Sign-On tab.
- Enable SAML authentication method.
- In the fields enter the information obtained from Okta.
- SAML SSO URL: Use Sign on URL from Okta
- Identity Provider Issuer: Use Issuer from Okta
- Public Certificate: Use contents of the Signing Certificate file you downloaded from Okta
Sign In from Deskradar
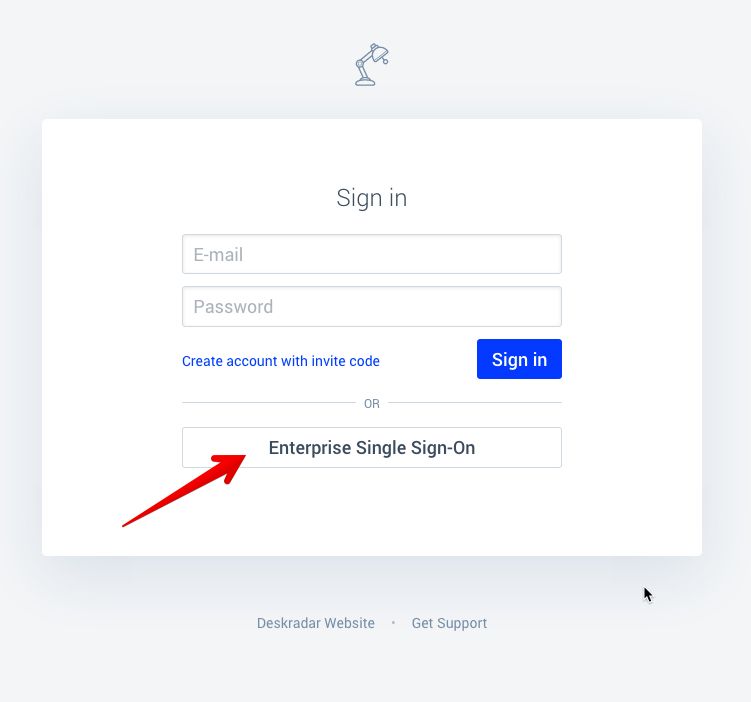
Launch your Deskradar instance by opening URL in your browser:
https://YOUR_DOMAIN.deskradar.cloudReplaceYOUR_DOMAINwith your Deskradar instance domain.Click Enterprise Single Sign-On button on the login view:
You will be signed in to Deskradar directly, if you’re already signed in with Okta.
You will be redirected to Sign In form on Okta, if you’re not signed in yet. You can enter your credentials there to sign in to your Okta account.
You will then be taken back to Deskradar and signed in to Deskradar as Okta user.
Sign In from Okta
You can launch Deskradar from your Okta User Home. You will be signed in right away.