Appearance
Single Sign-On with Microsoft Entra ID (formerly Azure AD)
This guide demonstrates how to configure single sign-on with Azure Active Directory.
Azure Active Directory Configuration
In order for the user to able to sign in to Deskradar using Enterprise Single Sign-On with your organization Azure Active Directory, the fields Given Name and Surname of the user record must be filled.
Add Deskradar Enterprise Application
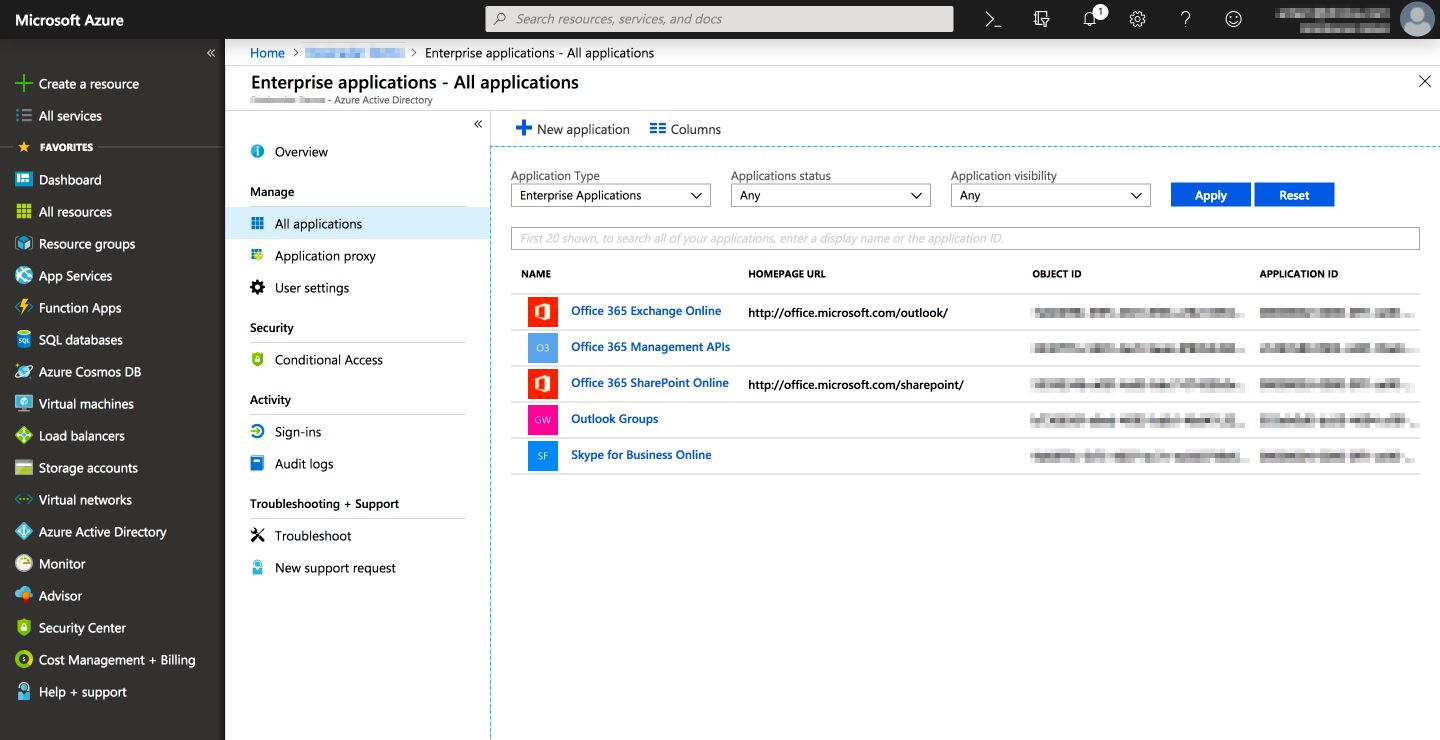
Log in to your Azure Portal. In the navigation panel on the left hand side, click Azure Active Directory. In the next level navigation panel, click Enterprise applications.
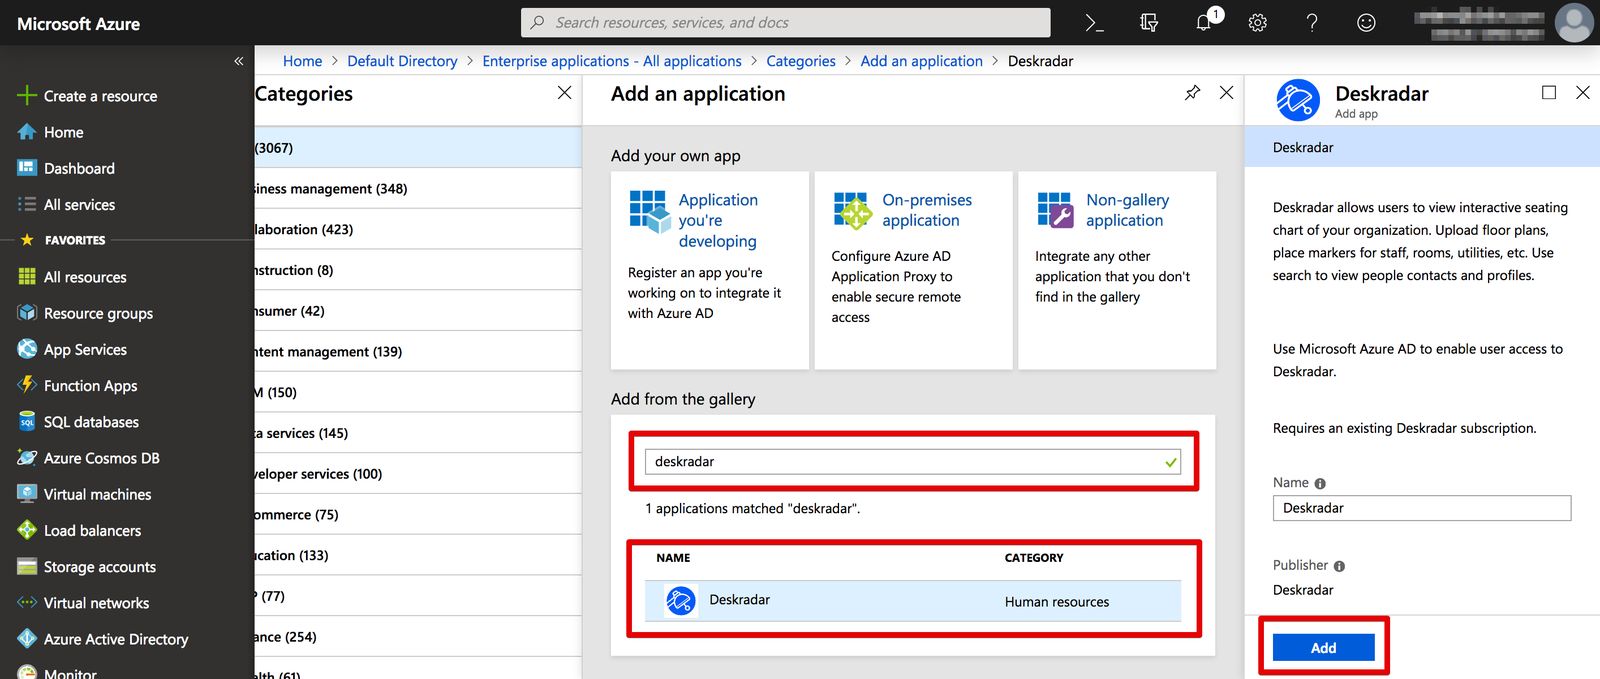
Click New application, then search for “deskradar” in the Add from the gallery section. Click Deskradar in the search results list. Click Add in the right hand side panel.
Setup SAML sign-on method
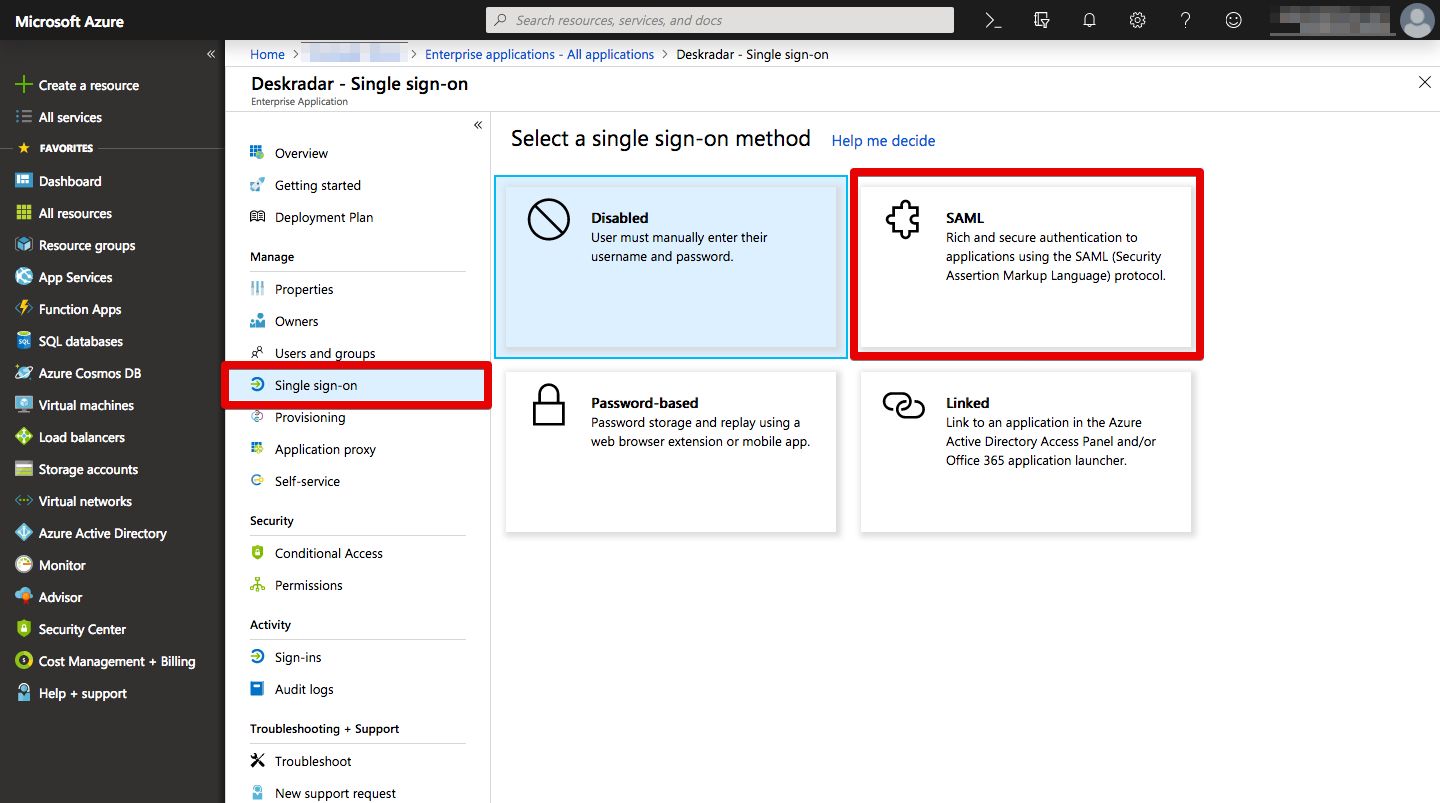
In the application navigation, click Single sign-on. Select SAML as single sign-on method.
Click Edit icon on Basic SAML Configuration.
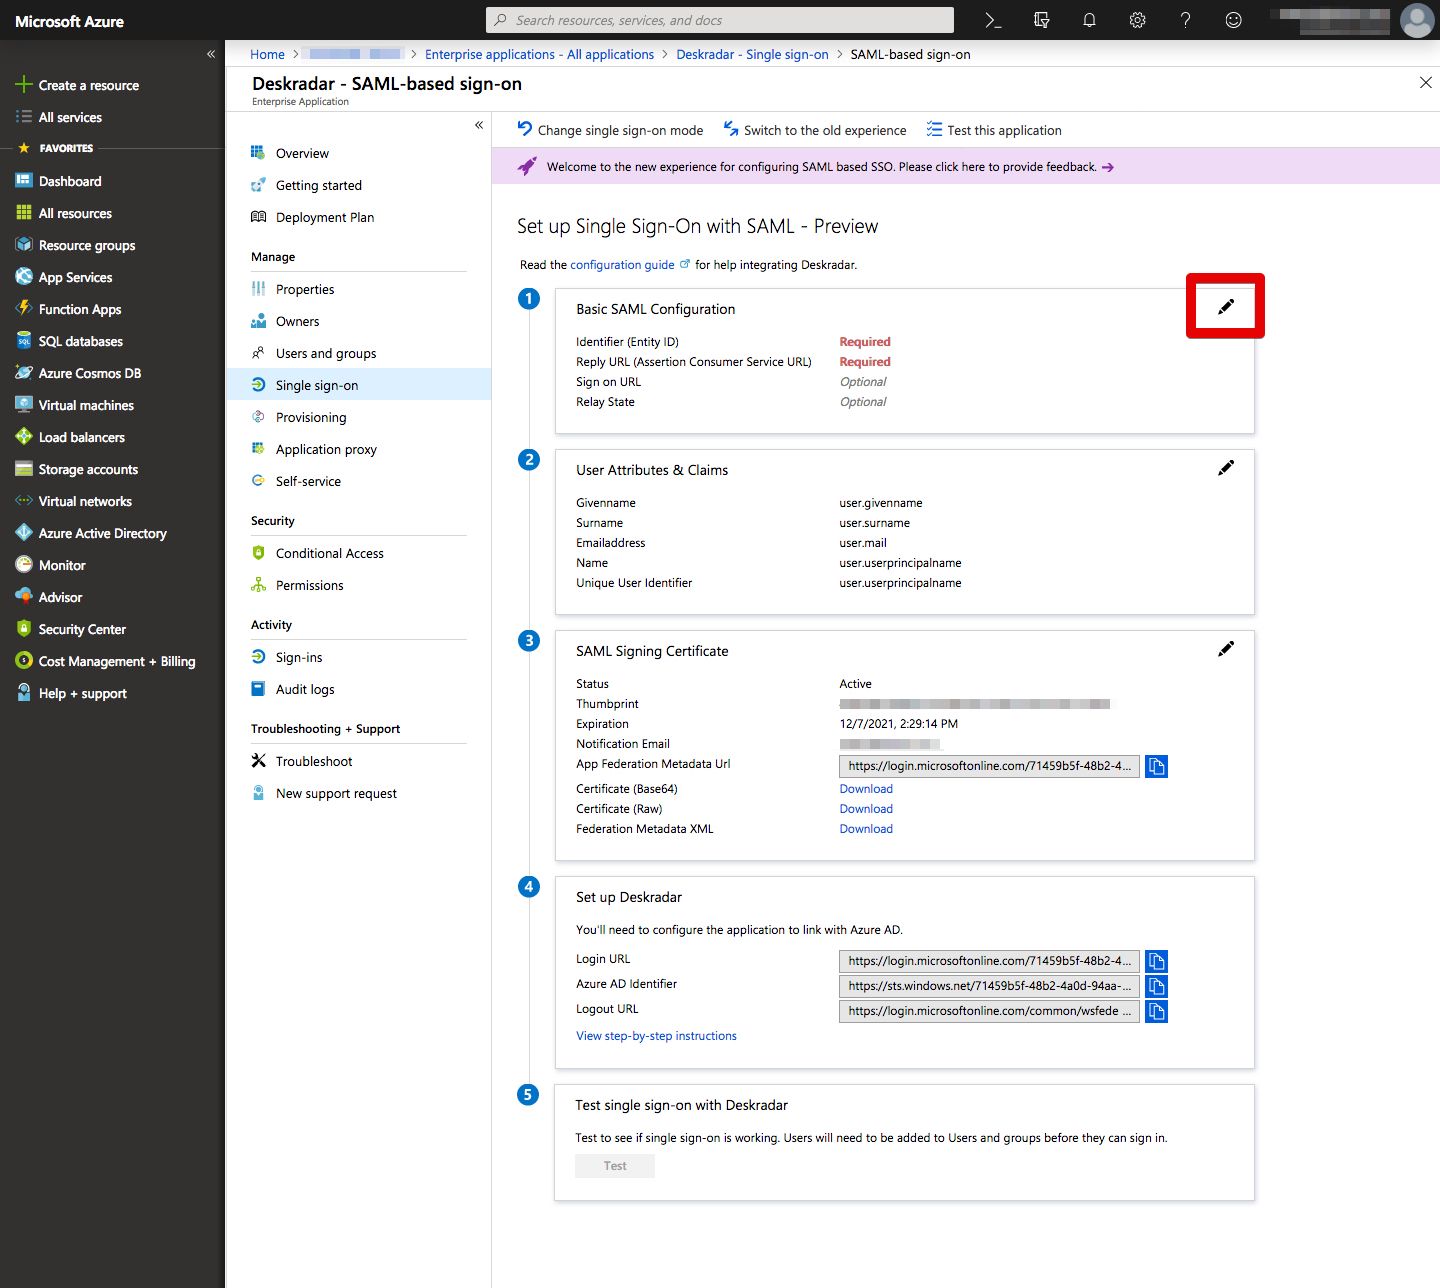
In the following values replace YOUR_DOMAIN with your Deskradar instance domain.
In the field Identifier (Entity ID) enter https://YOUR_DOMAIN.deskradar.cloud
In the field Reply URL (Assertion Consumer Service URL) enter https://YOUR_DOMAIN.deskradar.cloud/auth/sso/saml/consume
In the Set additional URLs section, in the field Sign on URL enter https://YOUR_DOMAIN.deskradar.cloud/auth/sso/saml/login
Leave field Relay State empty.
Click Save, then close the panel.
Setup SAML attributes
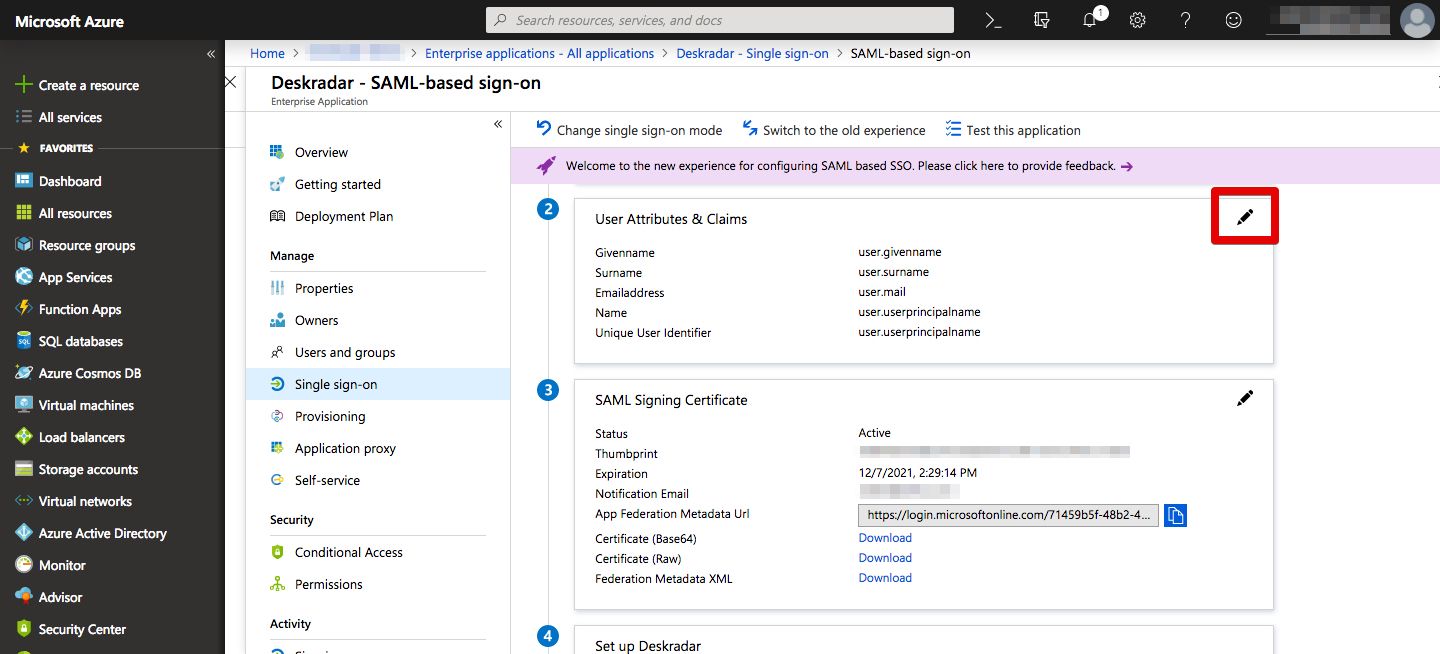
Click Edit icon on User Attributes & Claims section.
Make sure Name identifier value is set to user.userprincipalname Click Add new claim
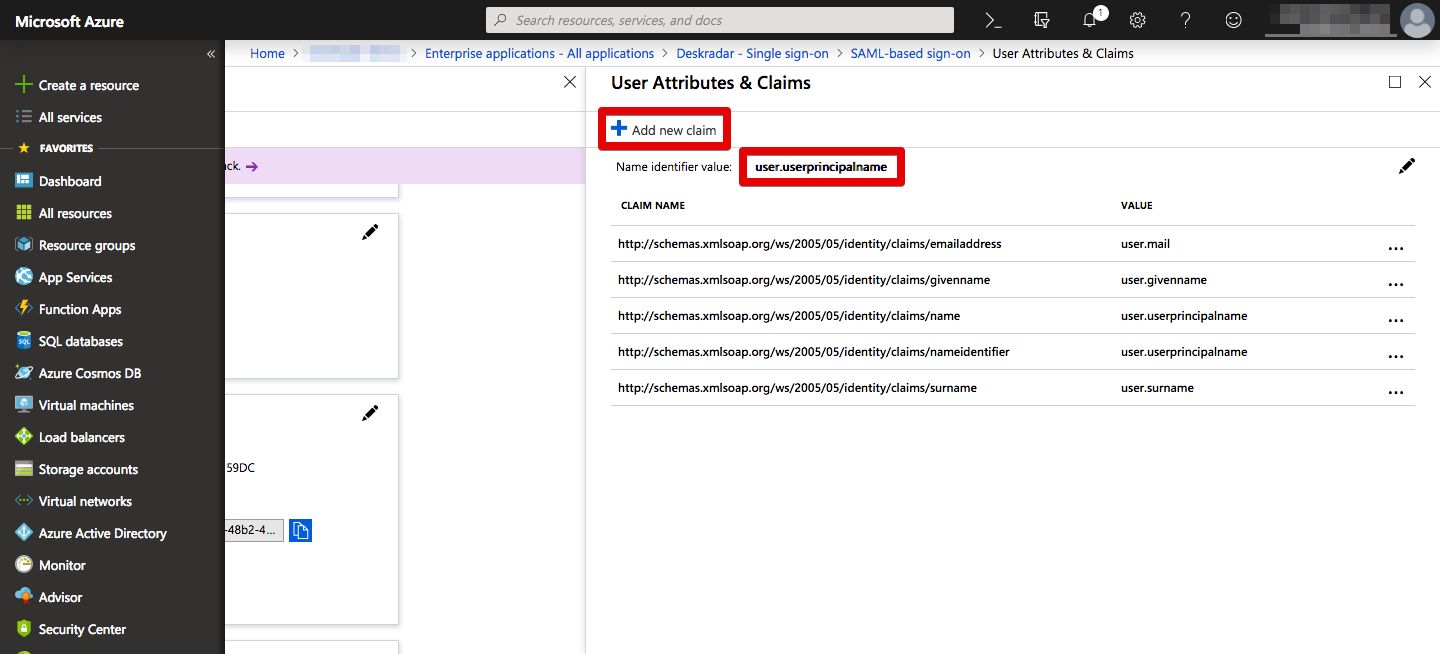
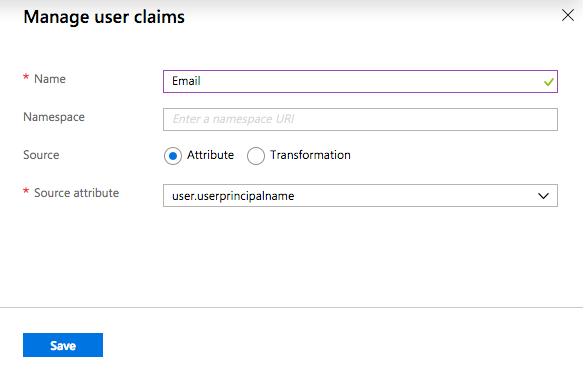
In the Name field enter Email. Leave Namespace field empty. Make sure Source field is set to Attribute. Set field Source attribute to user.userprincipalname. Click Save.
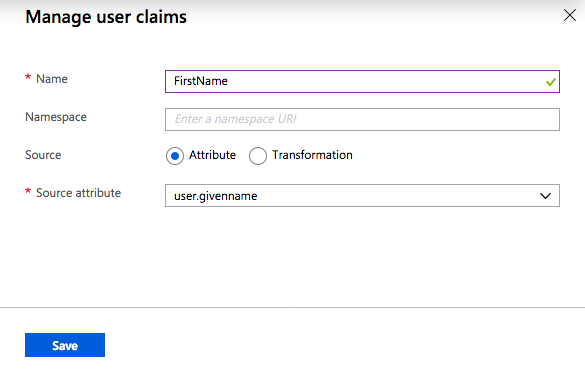
Click Add new claim. In the Name field enter FirstName. Leave Namespace field empty. Make sure Source field is set to Attribute. Set field Source attribute to user.givenname. Click Save.
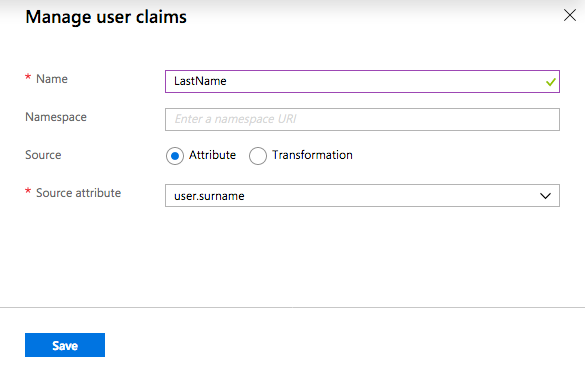
Click Add new claim. In the Name field enter LastName. Leave Namespace field empty. Make sure Source field is set to Attribute. Set field Source attribute to user.surname. Click Save.
Identity Provider Data
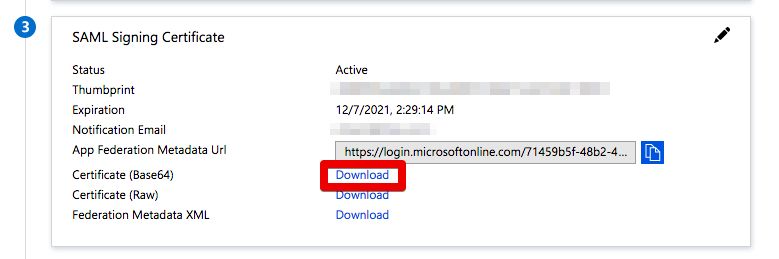
Scroll to section SAML Signing Certificate. Download Certificate (Base64).
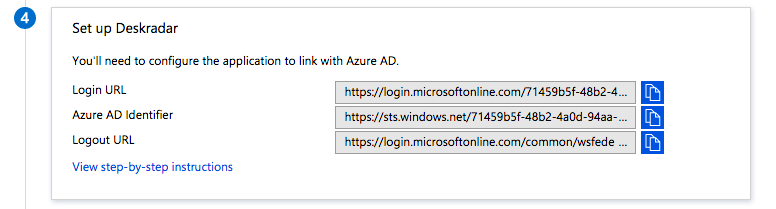
During Deskradar SSO setup you will need values of the fields Login URL and Azure AD Identifier.
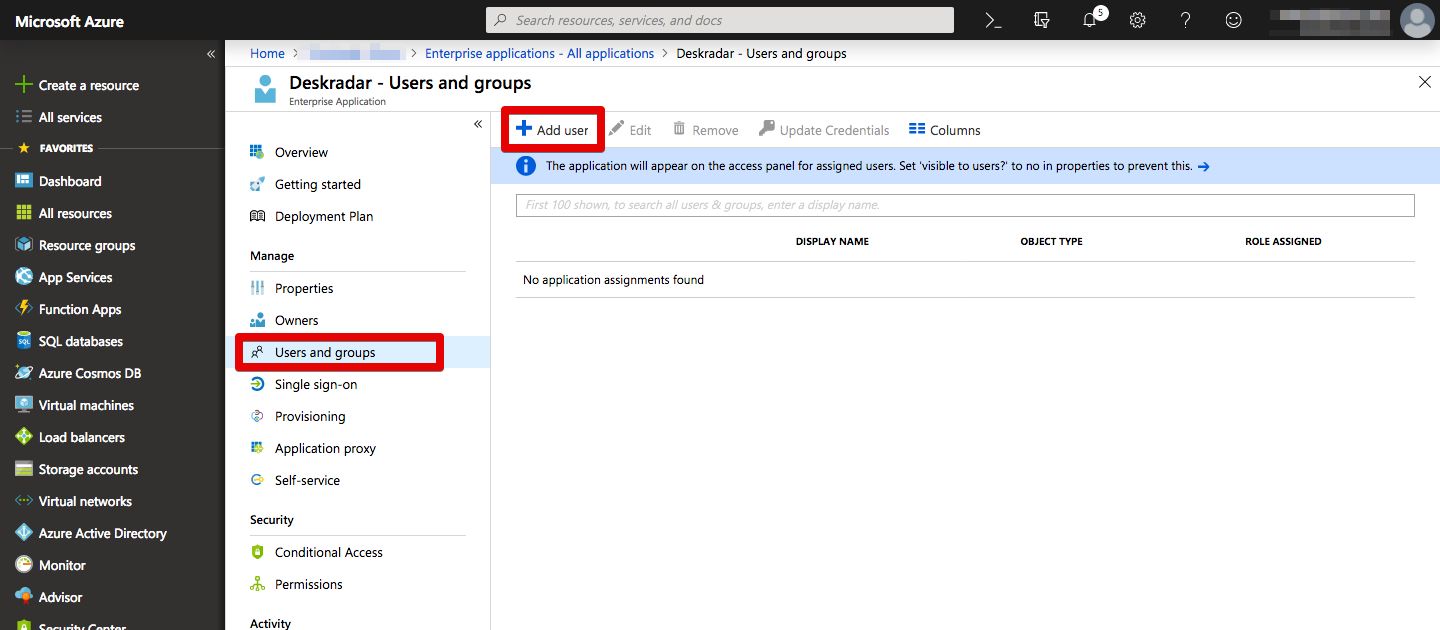
Setup User Access
You can disable User assignment required setting if you’d like all your users to be able to access Deskradar.
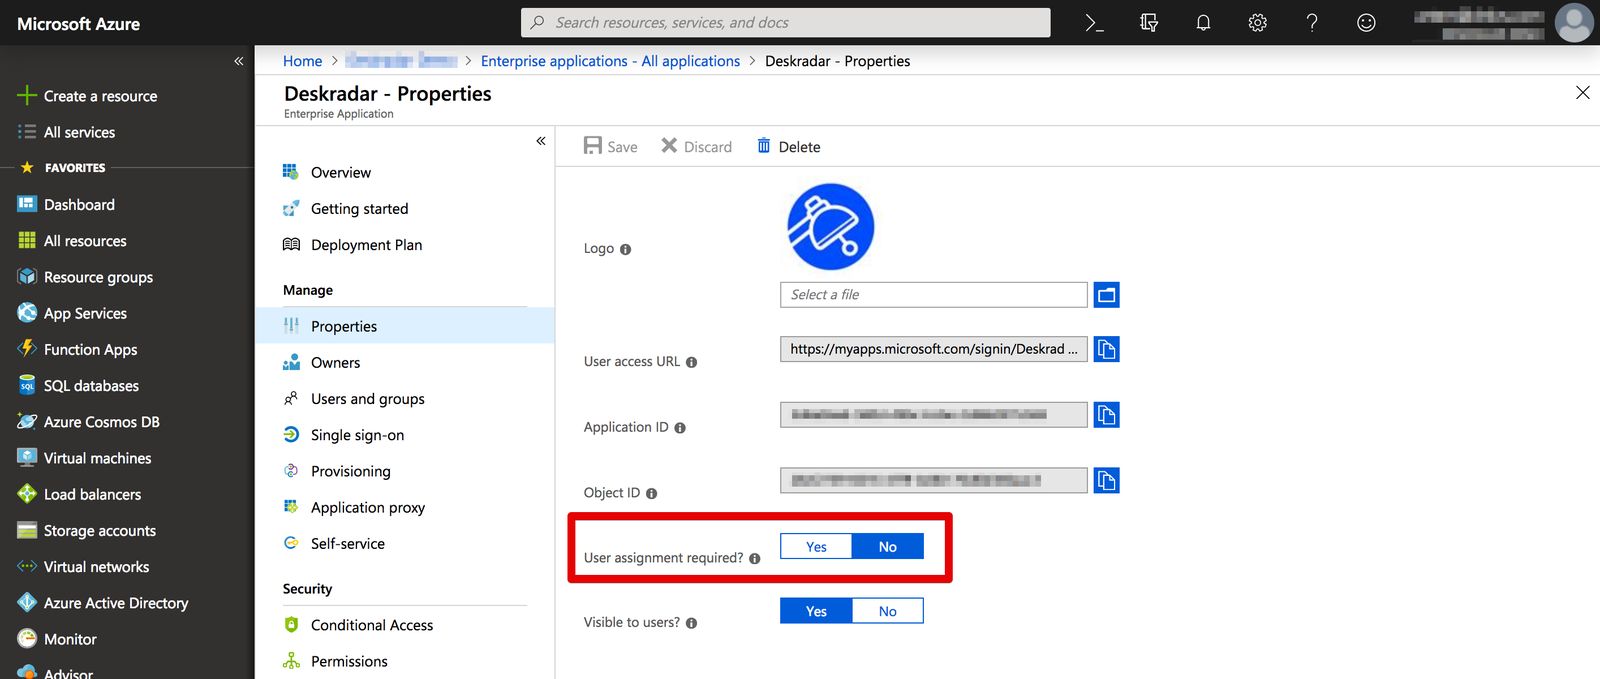
Alternatively you can assign users and groups to Deskradar application to have more control over who has access. Click Users and groups, then Add user to add users and groups you’d like to give access to Deskradar via single sign-on.
Deskradar Configuration
Log in to your Deskradar instance with administrator account using email and password you defined when you signed up with an invite link.
Open Team panel by clicking the icon in the Sidebar.
Switch to Single Sign-On tab.
Enable SAML authentication method.
In the field SAML SSO URL enter the value you obtained from Login URL in Azure Portal user interface.
In the field Identity Provider Issuer enter the value you obtained from Azure AD Identifier in Azure Portal user interface.
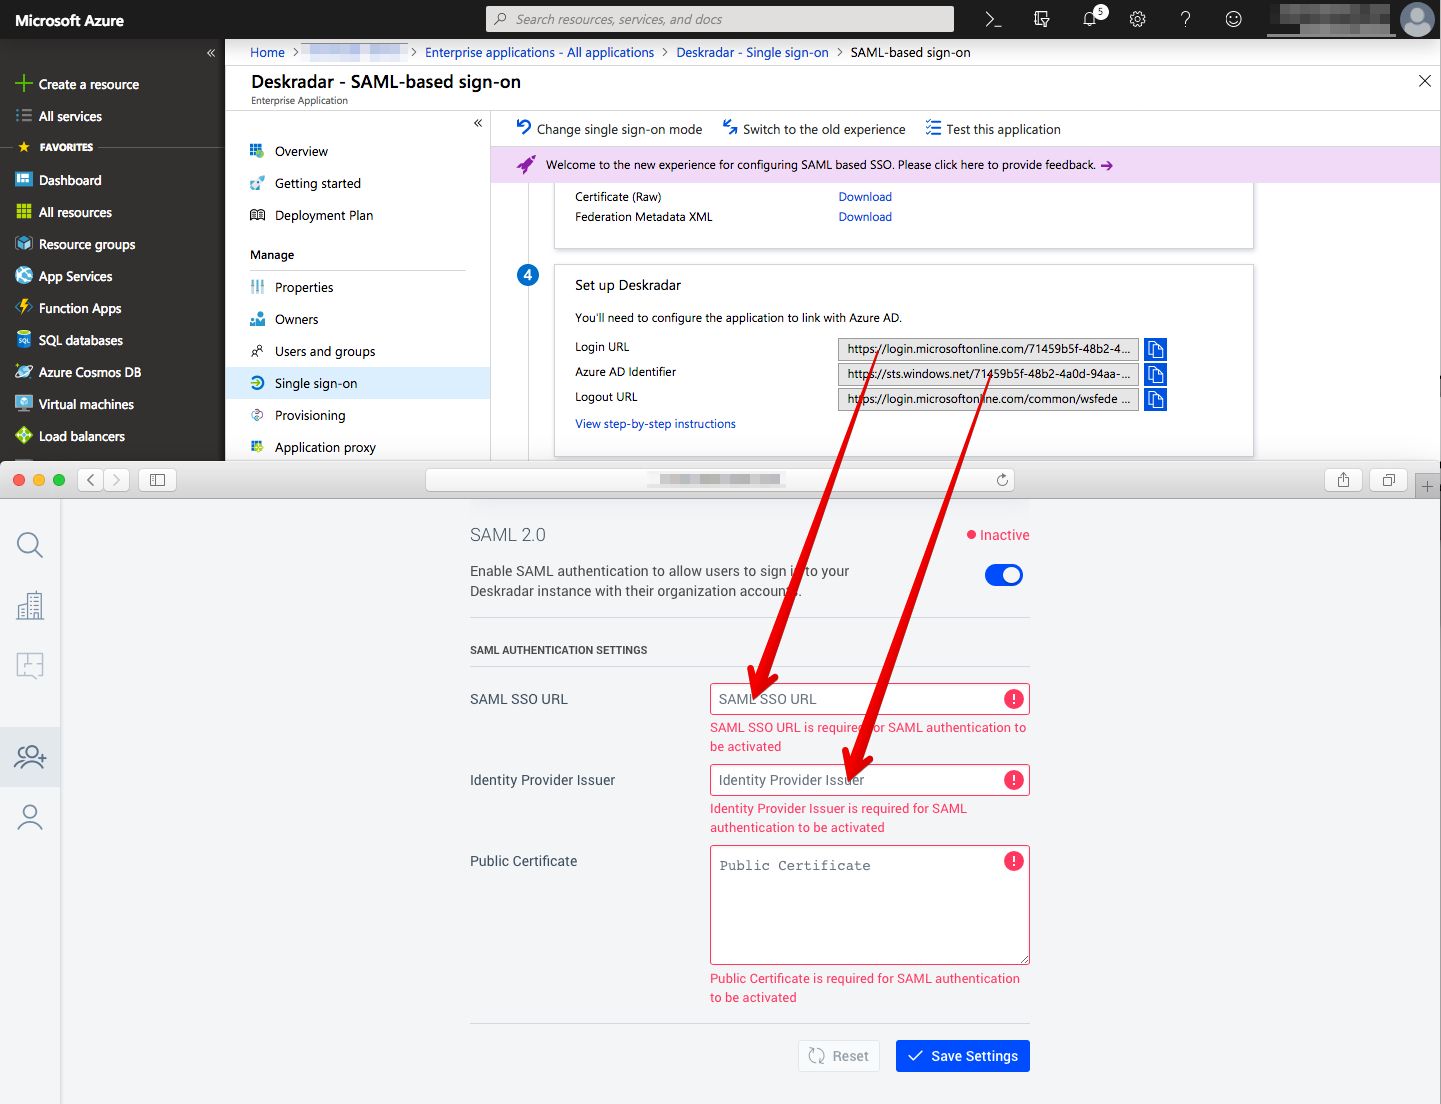
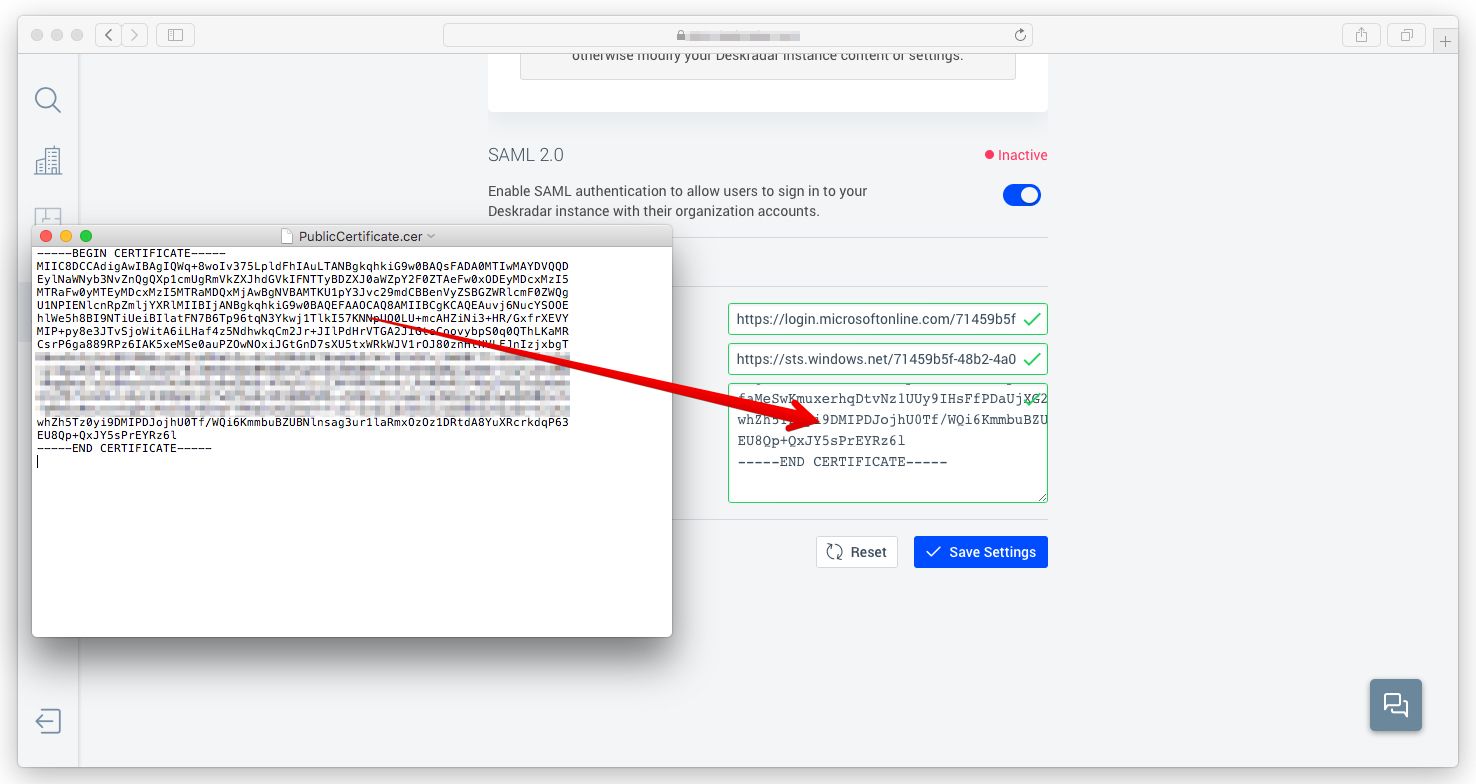
Open the Certificate (Base64) file with a text editor and copy and paste its content into Public Certificate field in Deskradar.
Sign In to Deskradar with SSO
After configuration is complete, users can sign in to Deskradar using their Active Directory account.
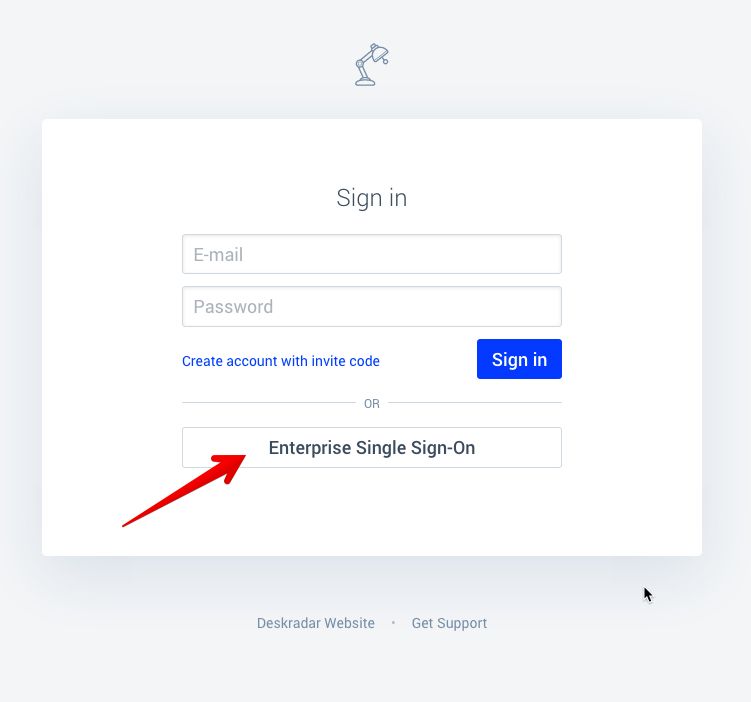
Sign In from Deskradar
Launch your Deskradar instance by opening URL in your browser: https://YOUR_DOMAIN.deskradar.cloud (replace YOUR_DOMAIN with your Deskradar instance domain). Click Enterprise Single Sign-On.
- You will be signed in to Deskradar directly, if you’re already signed in on Active Directory.
- You will be redirected to Active Directory Sign In form, if you’re not signed in yet. You can enter your corporate account credentials there to sign in.
- You will be taken back to Deskradar and signed in to Deskradar upon successful sign in with your corporate account credentials.
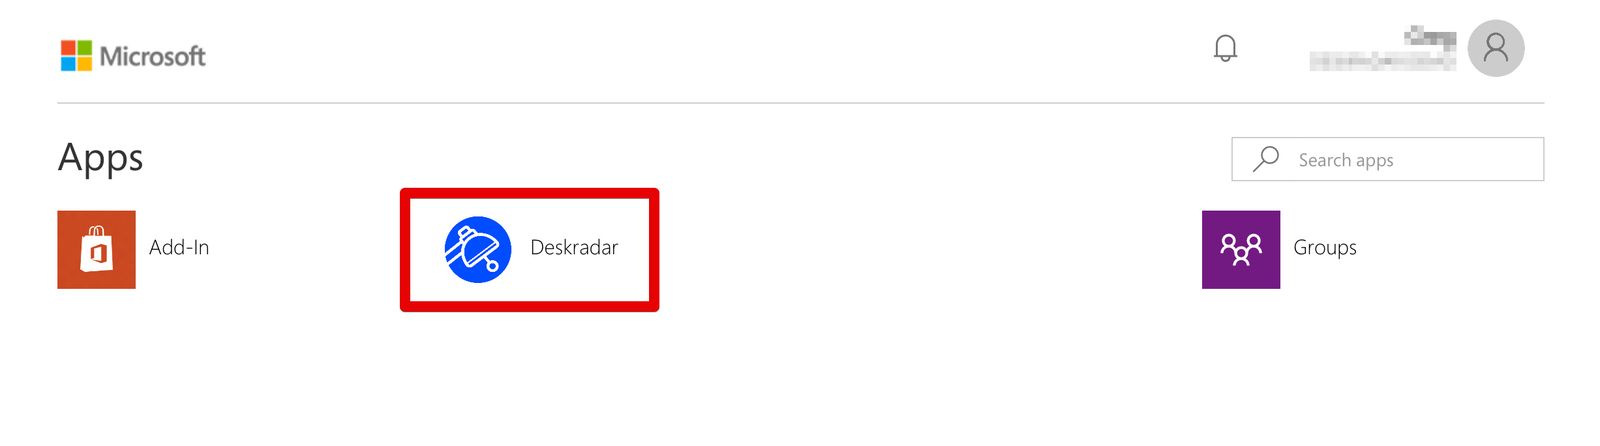
Launch Deskradar from MyApps Portal
Your can access Deskradar from MyApp Portal: https://myapps.microsoft.com